Range:
| Mode | Clock; first character | Meaning |
| D:H:M | d | Day Day : Hour Hour : Minute Minute |
| H:M:S | H | Hour Hour : Minute Minute : Second Second |
| M:S:S/100 | n | Minute Minute : Second Second : 10th 100th |
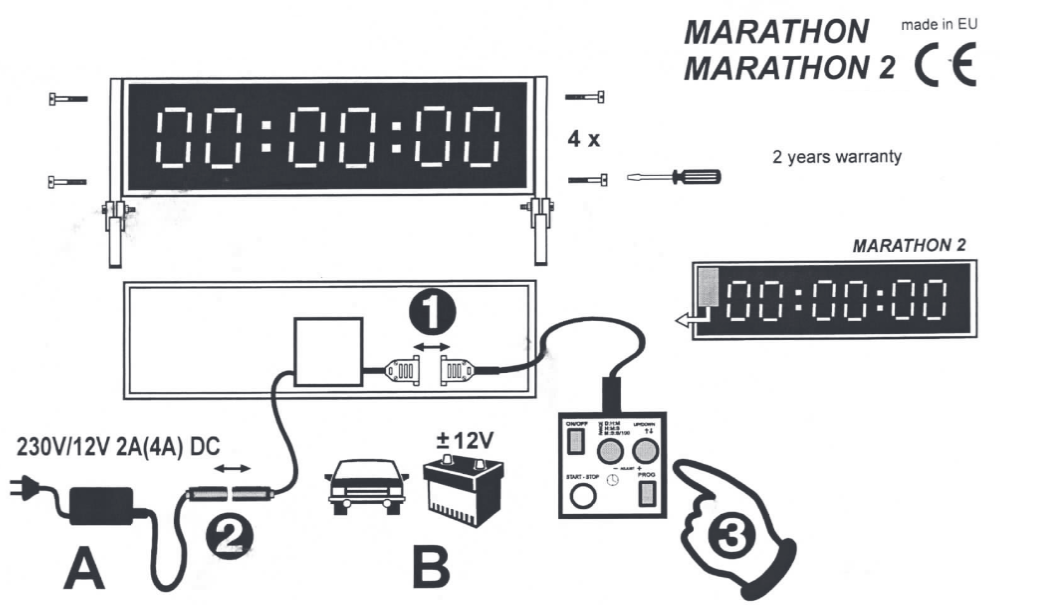
- Connect the remote as shown above.
- Connect the power as shown above. There are two ways to power the LED clock; either with the included wall-adapter or with the included crocodile clamp and a 12V car battery or other 12V power source.
- Turn on the LED clock by pressing the 'ON/OFF' button and wait until you see the following output: H┌┐:--:--
There are two basic modes of operation; counting up or counting down. It is possible to set the desired resolution (called range below) and start time for both modes.
The first character indicates the range, the second indicates if the clock will count up or down. The range can be changed with the 'RANGE' button
The direction of counting can be set with the UP/DOWN button. ' ┌┐ ' on the second character indicates that the clock will count up, ' ⌴ ' indicates that the clock will count down. - To exit the setup and enter the clock mode press the 'PROG' button.
- If you want to select another start time than 00:00:00, press the 'PROG' button again.
The first digits start flashing and can be adjusted with the '+' and '-' buttons, pressing 'PROG' again advances to the next digit. - Once the desired start time has been selected, start the clock by pressing the 'START - STOP' button.
- To reset the time to the set starting time, press both the '+' and '-' button at the same time.