One of the most important aspects of managing an event is the handling of participant data, this includes a range of default fields and functions but also allows you to store or calculate your own custom fields and functions. To simplify the work flow you can enable / disable certain default fields and also control how these fields behave when editing through the Participants Window.
Default Fields
Define some general settings for data handling in the Participants Window. Activate or deactivate standard fields and define if these are mandatory or not. If mandatory fields are not filled in the Participants Window, they are highlighted with a red bar and a warning will show when trying to save. Note that for the Online Registration mandatory fields can be defined separately.
Input Assistance / Settings
Control how data should be handled when entering/editing participants directly in the Participants window. When Age Group changeable is enabled then the Age Group can be manually changed, which can be useful if working with overlapping Age Groups - but note that this will be overridden if the Age Groups are recalculated at a later time. You can also disable Agender if that shouldn't be used throughout the event file.
User Defined Boxes in Results Tab
It is possible to set an output list to show at the top a participant window. This can be useful for events with a large number of results that are difficult to scroll through or show additional data not shown in the main participant window. 
Bib Numbers
These settings decide how the system handles bib numbers.
Assigning Bib Numbers
By default, the highest bib number +1 will be proposed when entering a new participant. However, there are two more options: First free bib number proposes the smallest unused bib number and No Proposal forces you to enter a bib number manually before entering the participant's data in the Participants Window.
If you do not want to allow certain bib numbers, enter these in the input box Exclude Bib Numbers. Then, these will not be proposed.
Bib Ranges
A Bib Range assigns a certain range of bib numbers to one contest. Having defined bib ranges, there are two options:
- After entering a bib number for a new record in the Participants Window, the contest according to the bib range settings will be selected. For this option select Use bib ranges to propose contest.
- After selecting a contest for a new participant in the Participants Window, a bib number from the bib range will be assigned to the participant. Therefore select the option Use bib ranges to propose bib number.
- You can also temporarily ignore bib ranges.
Also, you can define different start times per bib range.
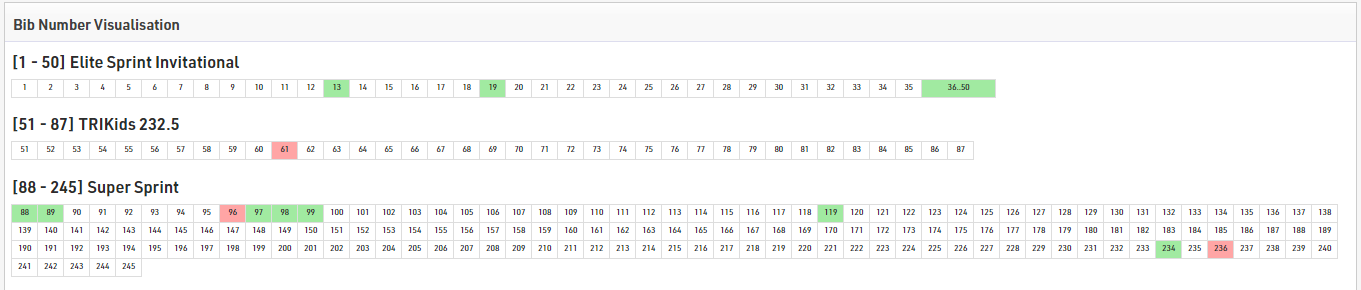
Bib Number Visualisation
The bib number visualisation creates a table with all bib numbers available for each Contest according to the Bib Ranges setup. The bib numbers may be shown in 3 different colours.
White - The bib number is already assigned
Green - The bib number is not assigned yet
Red - The bib number is assigned but the participants Contest does not match the Bib Ranges set
Additional Fields
If you want to collect additional data, you can define an unlimited number of additional fields to store participant data. Additional fields can be grouped together with custom group labels, each group will be displayed in a separate box in the participants tab.

Additional fields require a unique field name, and can additionally have a separate label which will be displayed in the participants window and registration forms.
Field Type
Each additional field has a type which changes the input and display characteristics of the field, or how the field is to be used.
| Text Field | Creates a text box for typing any text value |
|
Drop Down |
Creates a drop-down field to select a pre-defined value from the provided selection values. Selection values should be entered as a list of semi-colon separated values, the first of which can be empty to offer an option for no value or to prevent pre-filling of the field (e.g. ;S;M;L;XL) |
| Check Box | Creates a check box to mark a value as true or false, returned as either 1 or 0 |
| Number (Integer) | Allows only numerical input of whole numbers |
| Number (Decimal) | Allows only numerical input of any decimal value |
| Date | Creates a date entry field in registration forms / kiosks, only accepts date values which should be formatted according to your date format settings |
| Currency | Allows only numerical input with a maximum of 2 decimal places |
| Country |
Creates a drop-down pre-filled with a list of available countries |
| Only allows correctly formatted e-mail addresses to be entered | |
| Phone Number |
Upon completion formats numbers only as phone numbers Values entered without an international dialling prefix will be prepended with the dialling code of the event country |
| Transponder | Values entered will be handled as transponder assignments in place of the Chip File or default Transponder fields |
Extended Settings
| Active | Whether the field is activated and should be displayed in the Participants window |
| Mandatory | If the field should be considered mandatory |
| Default Value | The default value in the field when creating new participants |
| Placeholder | A placeholder text displayed in the input when empty |
| Min Length | The minimum length of the value for the field |
| Max Length | The maximum length of the value for the field |
User-Defined Fields / Functions
Creating your own Fields and Functions allows you to quickly and easily call specific data without creating a long expression each time. User-Defined Fields/Functions are normally used with other data fields, or are used to return the same for every participant.

Some default User-Defined fields are available when creating a new file, such as MaleFemale which converts Gender to the full gender label. These default fields can be updated as you prefer.
When creating User-Defined fields the Expression must be formatted as a RACE RESULT 14 Expression.
When writing functions which should take additional parameters then the field name should use brackets around a semi-colon separated list of identifiers (e.g. Function(x;y) creates a function with 2 parameters x and y).
Parameters can be accessed inside the function by wrapping them in square brackets (e.g. [x] and [y]).
e.g. YesNo(x) - if([x];"Yes";"No") is normally used with Check Box values to return "Yes" or "No" in an Output List if the value of [x] is 1 or 0.
It can also be useful to write a note for each function to describe its purpose or how it should be used.
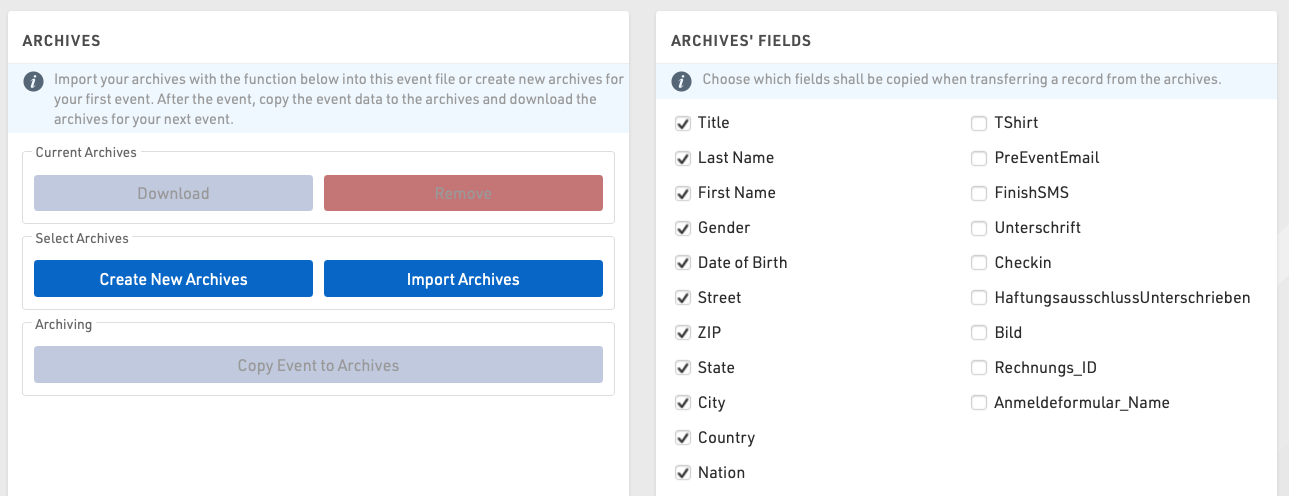
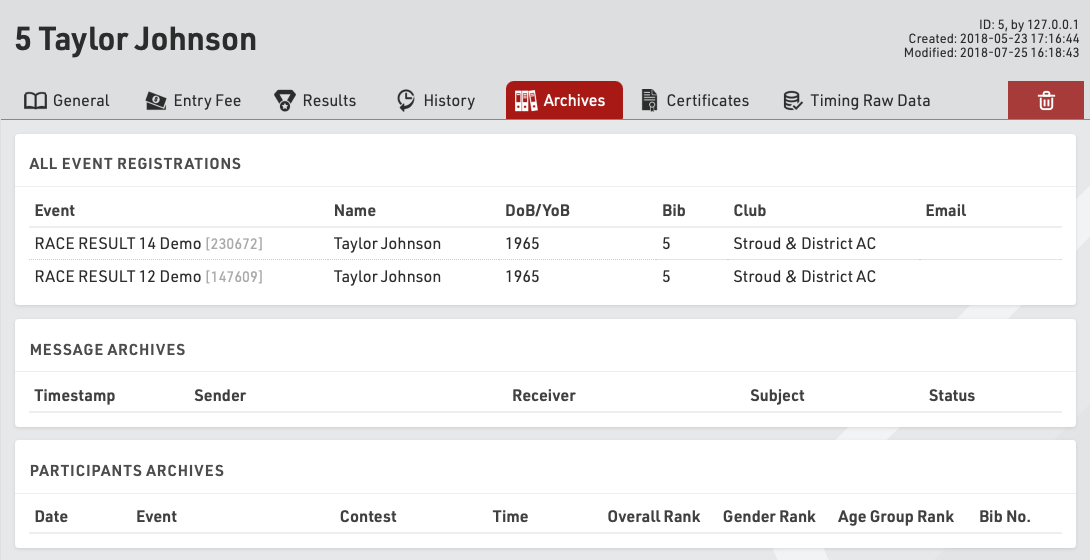
Archives
Using Archives, you can access data from previous events in the Participants Window:
- When manually entering a new participant, the records from the Archives will be suggested, so that you can import the record including attributes from the Archives.
- Results from previous events will be available in the Archives tab.
Procedure for Using Archives
After the event, go to the Archives settings. When using the archives function for the first time, create a new archives file and then write the data into it (button Copy Event to Archives).
For next year's event you can create a copy of the event file which then still includes the archives file.
If you already have an event file for the upcoming event, you can proceed as follows:
- Open last year's event and create a new archives file in the Main Window. Copy the event data to the new archives file and then download it to your local PC.
- Open next year's event and import the archives file from your local PC. If there already is an archives file in the new event, it needs to be deleted first.