The Participants Window serves to add new participants and to edit existing participants. Times and ranks can also be controlled and edited if need be.
The Participants Window was already introduced in the RACE RESULT 12 Introduction which covers adding / changing data and looking up participants.
Read more about how to configure Participant data to choose which data fields are shown in the General Tab.
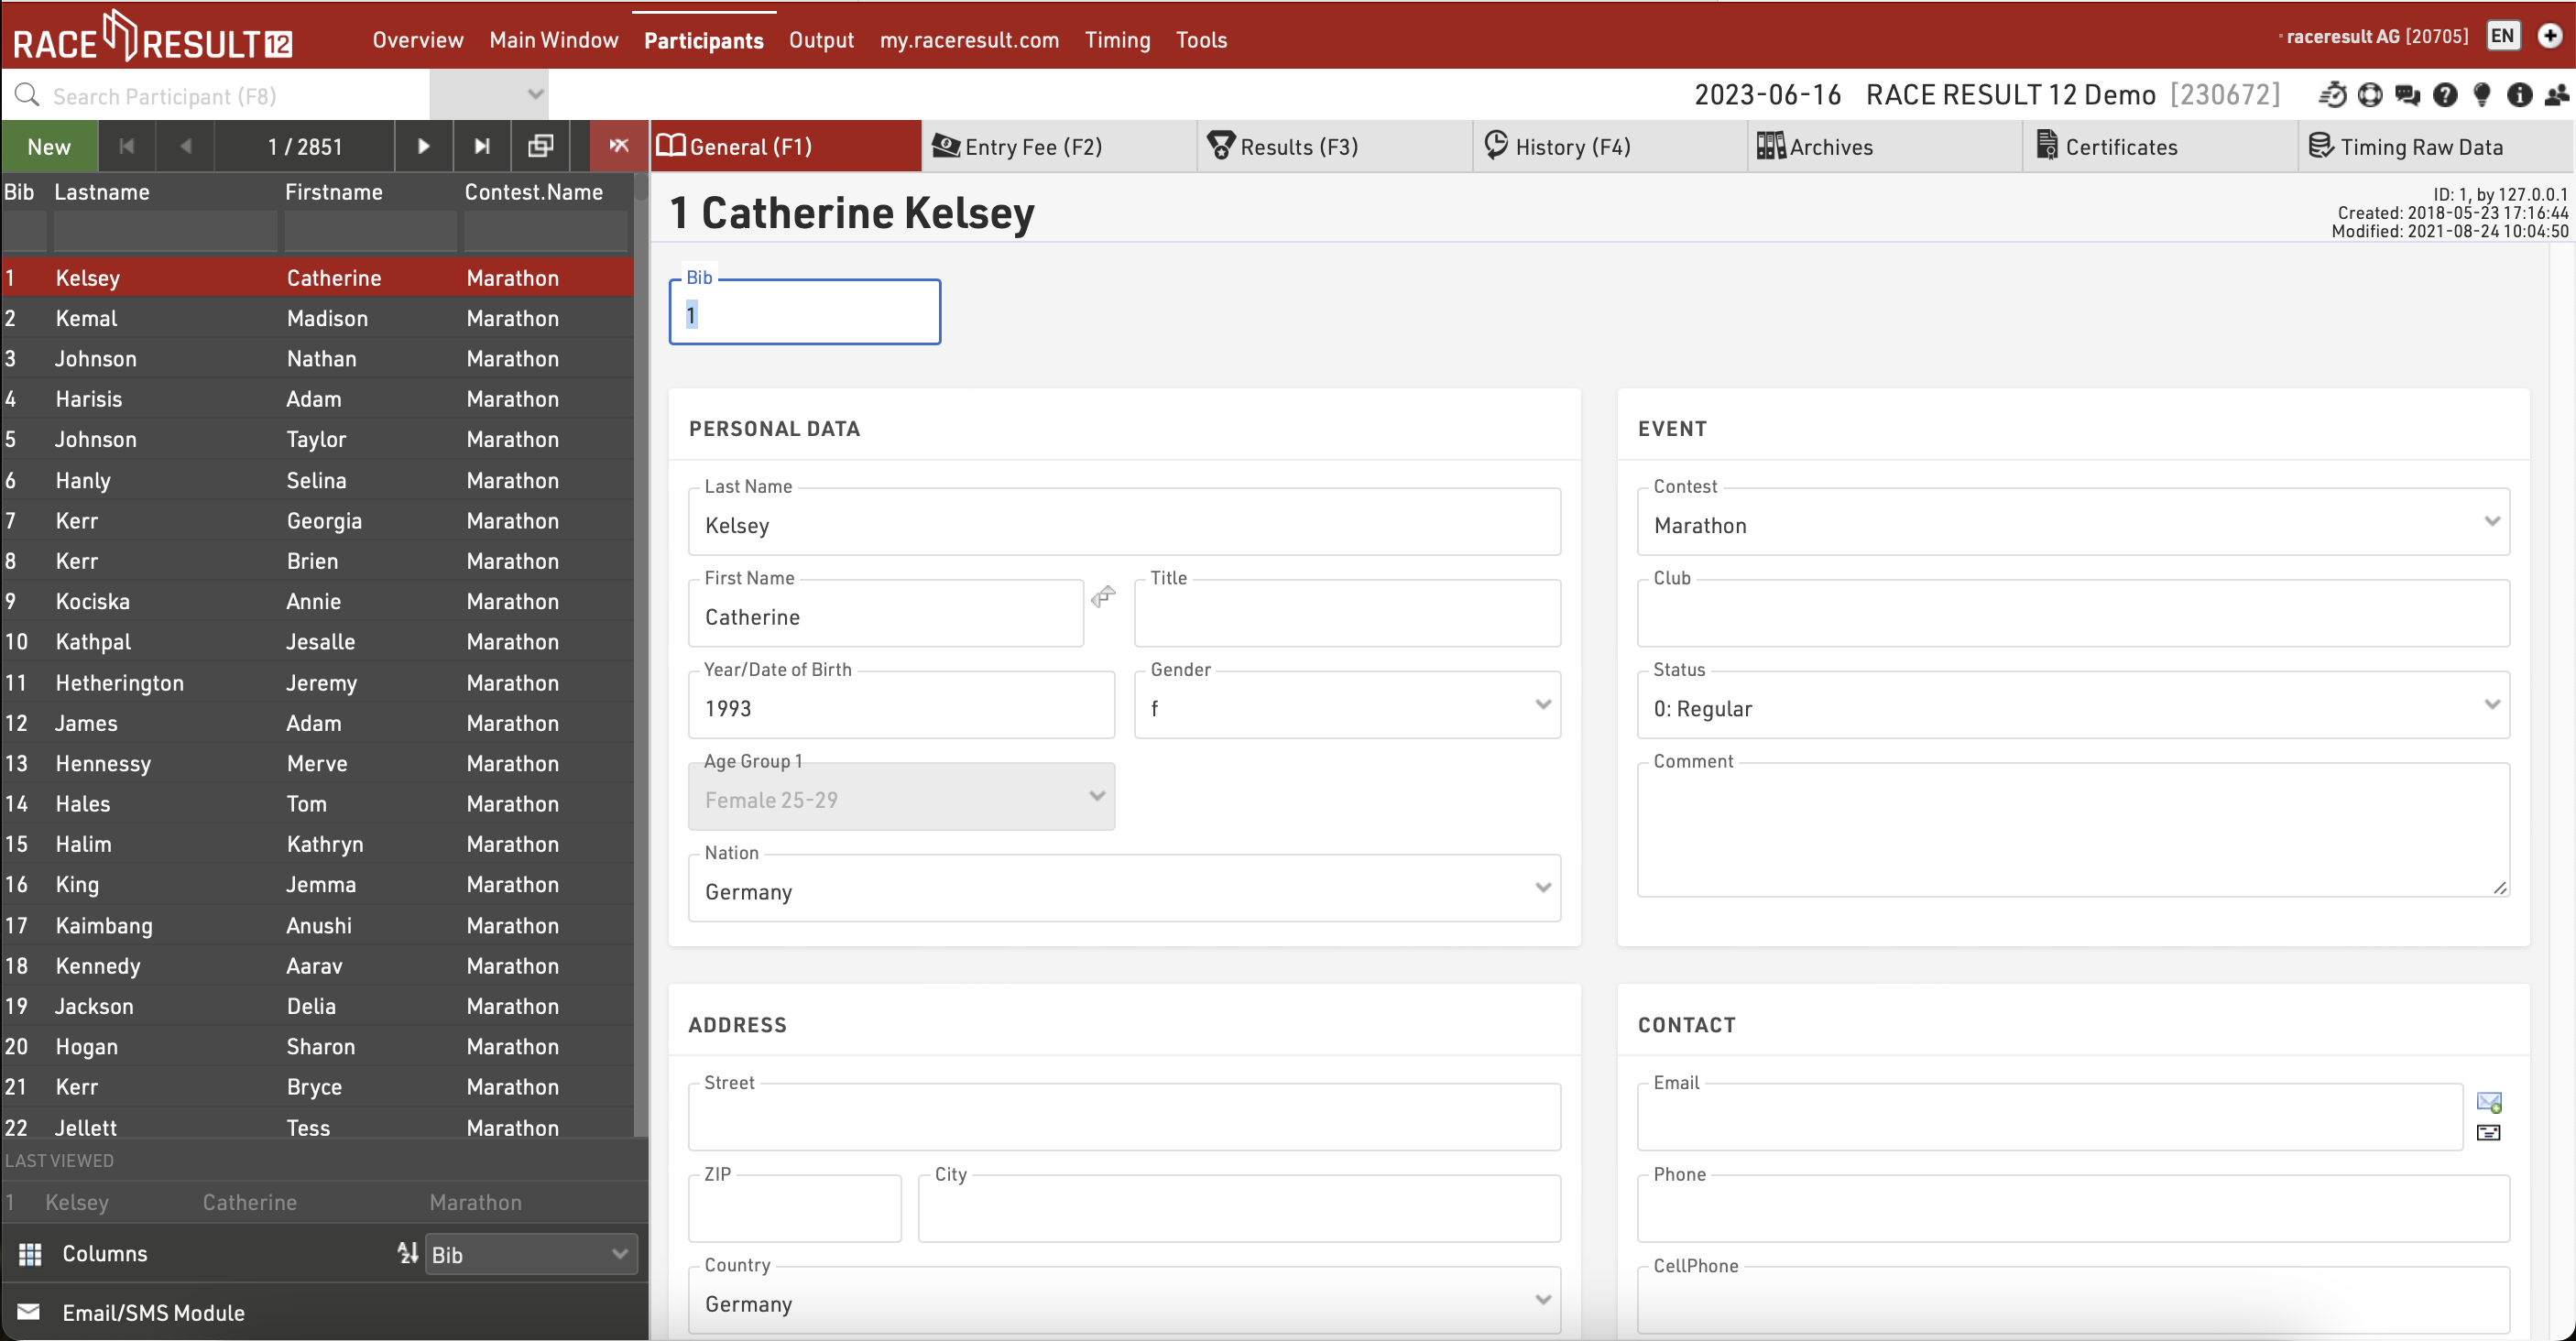
List View
The left side of the Participants Window presents participants in a list view and gives an overview of all participant records in your event file. A list of your recently viewed participants will be shown at the bottom to quickly get back to a particular participant.
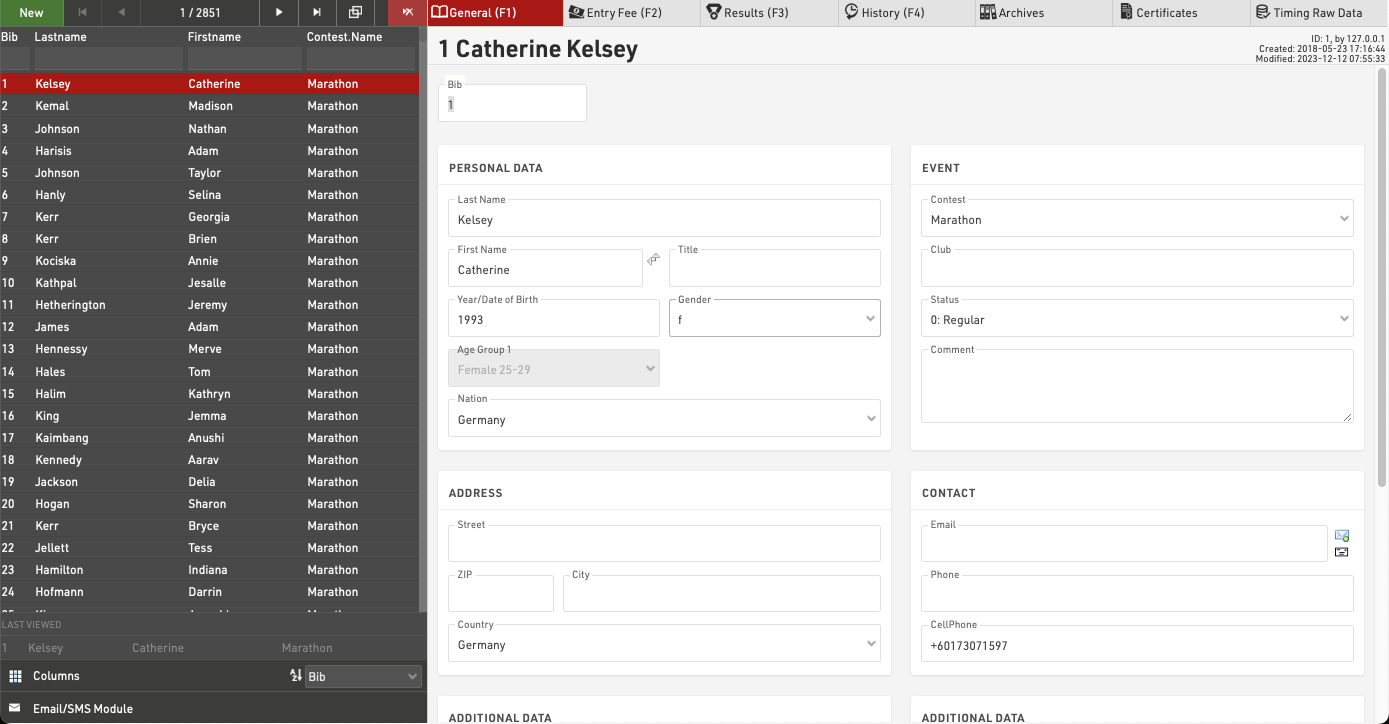
Navigating & Editing Participants
The navigation bar allows you to create new participant records, delete participant records or scroll through the list of participants. When using the navigation buttons for first/previous/next/last these will consider the sorting in the list view for the sorting of participants.
Clicking a participnt in the list view will open that participants full details in the right side of the window allowing all their data to be viewed / edited.
Note that the list of participants will be cached by the browser so when importing new participants or editing large batches of data you may need to reload the data using the reload button  in the navigation bar.
Sorting / Searching & Filtering
By clicking on the head of a column you can sort the table by this column. Press the same column head a second time to sort in descending order.
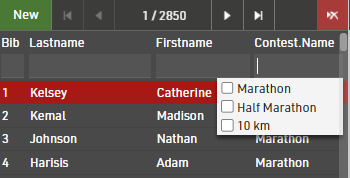
The textboxes underneath the column headers can be used for filtering the list. Simply enter a value to search, or some fields will provide a drop down with multiple selection values.
Additionally at the bottom of the list view there is a drop-down with some quick options for sorting from A-Z.

Configuration of Columns
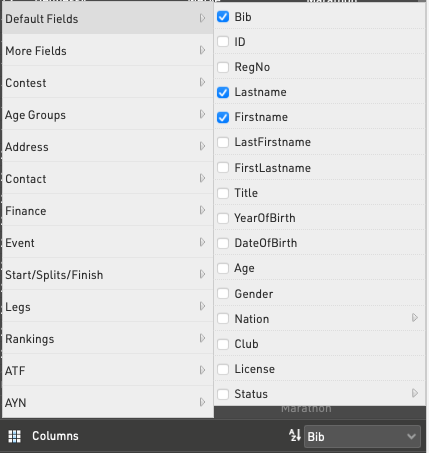
Besides the standard columns you can add other columns to the List View or hide columns not needed. To change the visible columns hover over the columns icon at the bottom of the list view, an overview with all available fields will pop up, allowing you to check and uncheck the fields.
Email / SMS Module
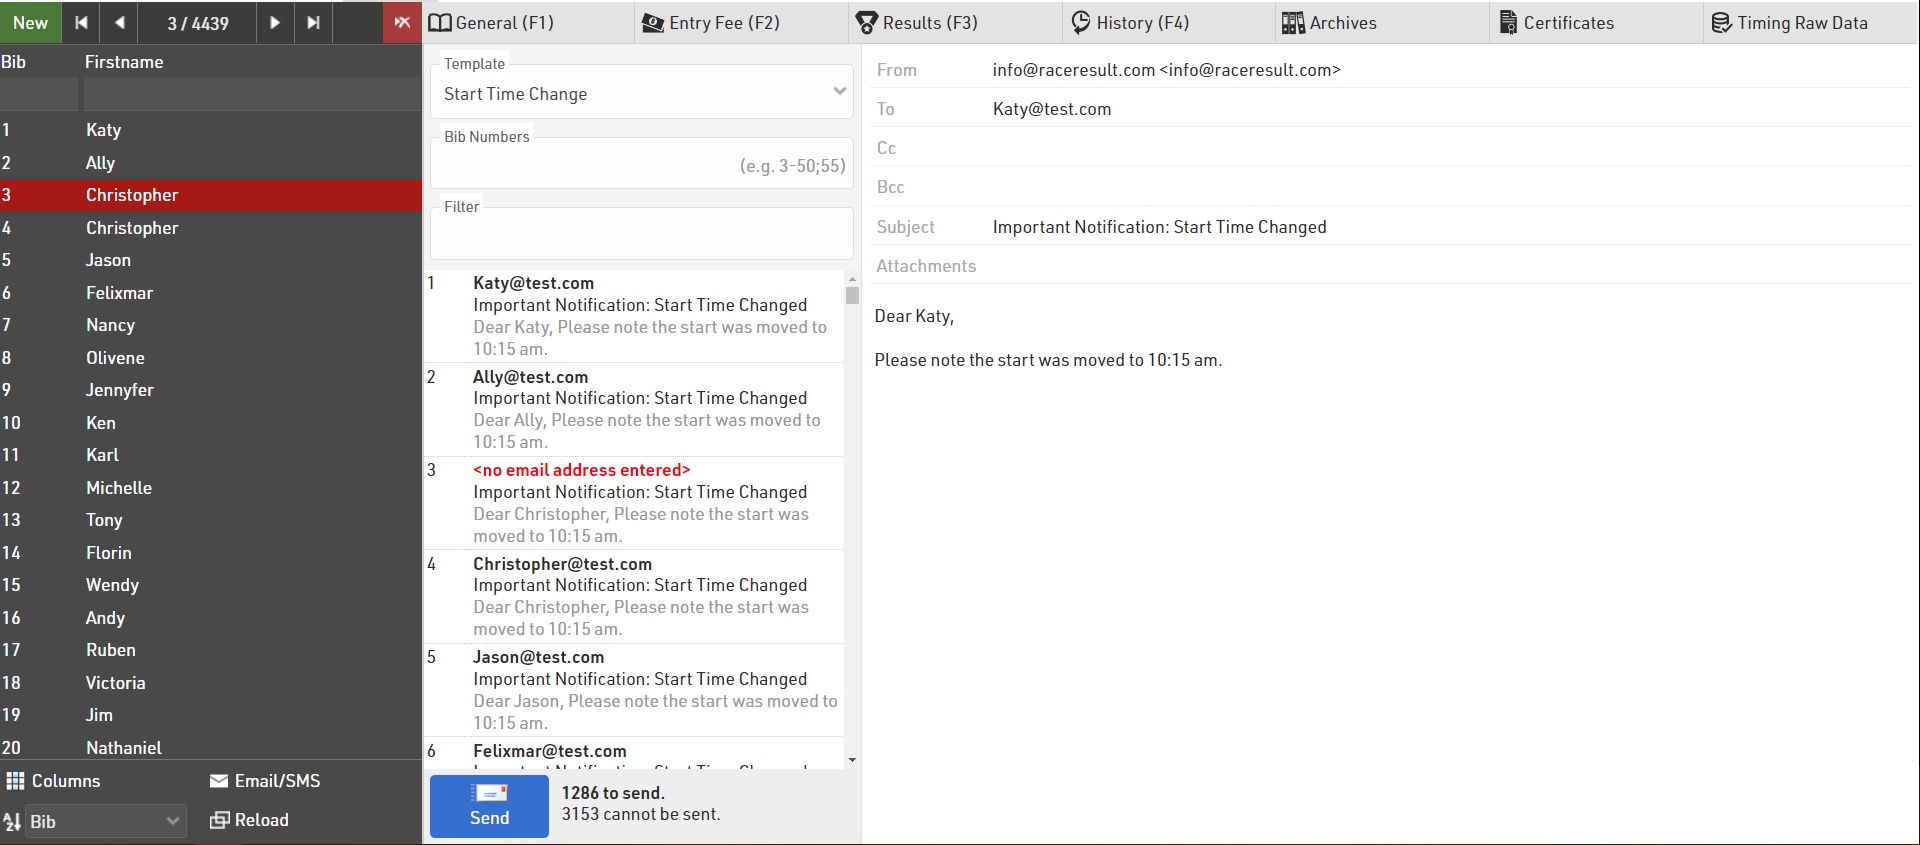
The Email / SMS Module allows for bulk sending of Email/SMS Templates to participants.
Select a template from the dropdown and a list of all messages to send will be populated below. You can additionally check if the filter is correct and adapt this if necessary.
Clicking on an item from the list will show a full preview of the message on the right side, note that individual e-mails cannot be edited.
If a participant does not have a valid email address, it will be marked red with <no email address entered>.
At the bottom of the list you can see the number of messages which will be sent, and how many cannot. Clicking the Send button will start sending the messages, note that these are sent individually and so you need to keep the window open until sending is complete.
Entry Fee
If using online registration and payment through my.raceresult.com you can review each participants payment details.
Type displays the following;
- Entry Fee - A break down of each fee due according to the entry fee table.
- User Fees - Transaction fees based on the selected payment option.
- Payment - Any payment which has been received for the entry.
The Payment details also provide a unique payment reference and ID, the payment method, date and time and also the amount billed / received.
Below this are 2 sets of information;
- "OPEntryFee - EntryFee" - The entry fee which has been billed subtract the total amount due for the entry.
- "OPBalance" - The actual amount received minus what is owed, if negative then not paid completely, if positive then too much has been paid.
OPBalance may be non-zero if the participant changes contest / details which affect the entry fee they should have paid.
Results
The Results tab shows the relevant information according to your timing and scoring setup for that participant.
The Results Tab will show different tables for Splits, Legs and Results, Ranks, Team Scores and Participant Attributes, each showing the corresponding information.
For each Split the table shows Time of Day, time from Gun, time from Chip, Rank (from Gun or Chip according to the Contest Time Mode), Sector time (from previous Split) and Speed.
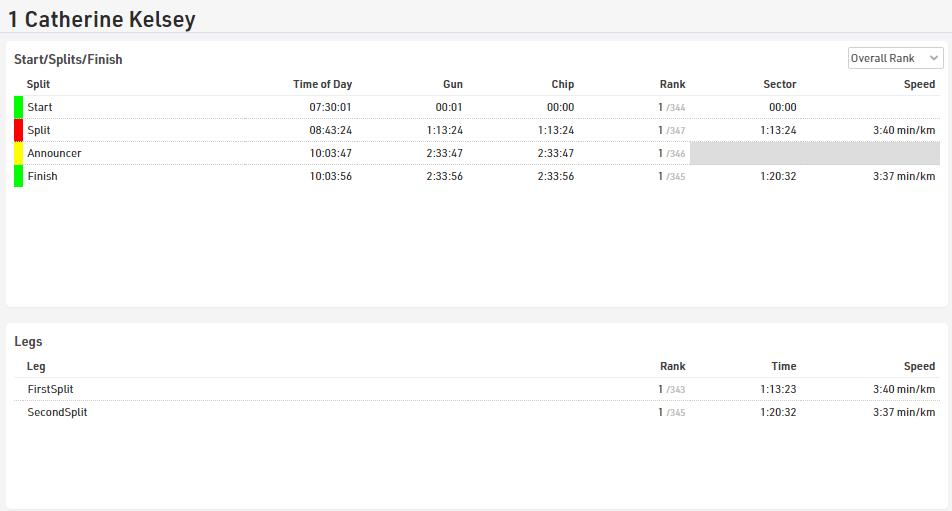
For splits which have not yet been reached or are missed then the Predicted Times are shown, a predicted time can be turned in to a manual Raw Data Record by clicking the + symbol. The Time of Day can then be edited and saved by pressing the enter key.
The Rank includes a drop-down to switch between Overall, Gender, Age Group or None, speed shows the SpeedOrPace field for the sector according to the default format of the split.
For each Leg the Rank, Leg Time and Leg SpeedOrPace is shown, the Rank is controlled by the same dropdown as per the Splits table.
Results are listed in order of the Result ID with T0 always listed first, Ranks and Team Results are shown in order of their ID so you can quickly look up an individual's rank.
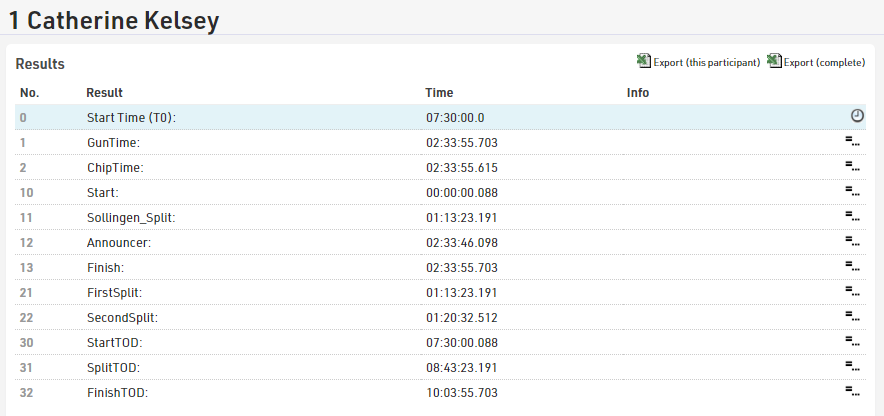
Using Raw Mode a Result can be manually overwritten by hovering over the result and selecting the edit icon. The result field will become editable. Once entered the adjusted result will turn red indicating the time has been overwritten. Should the raw data be recalculated, the overwritten value will remain.
To delete the overwritten result, select the red cross next to the result to return the raw data calculation. If you need to delete all overwritten results refer to Delete Overwrite Values.
History
The History records all changes made on a participant's record. This concerns all data fields such as name, contest, additional fields or status of the participant.
You can review all these changes in the Participants Window in the History tab, here you can see all of the changes which have been made to which field, and by which user or software tool. Additionally you can revert changes either individually or in bulk, by using the checkboxes.

In case there are a lot of changes in your Event File, the history might inflate the file. You can delete all History entries via the Delete Data function.
The history can also be downloaded as an excel for an individual participant or for all participants if you need to review bulk changes or as a backup before deletion.
Archives
In the Archives tab, there are three sections:
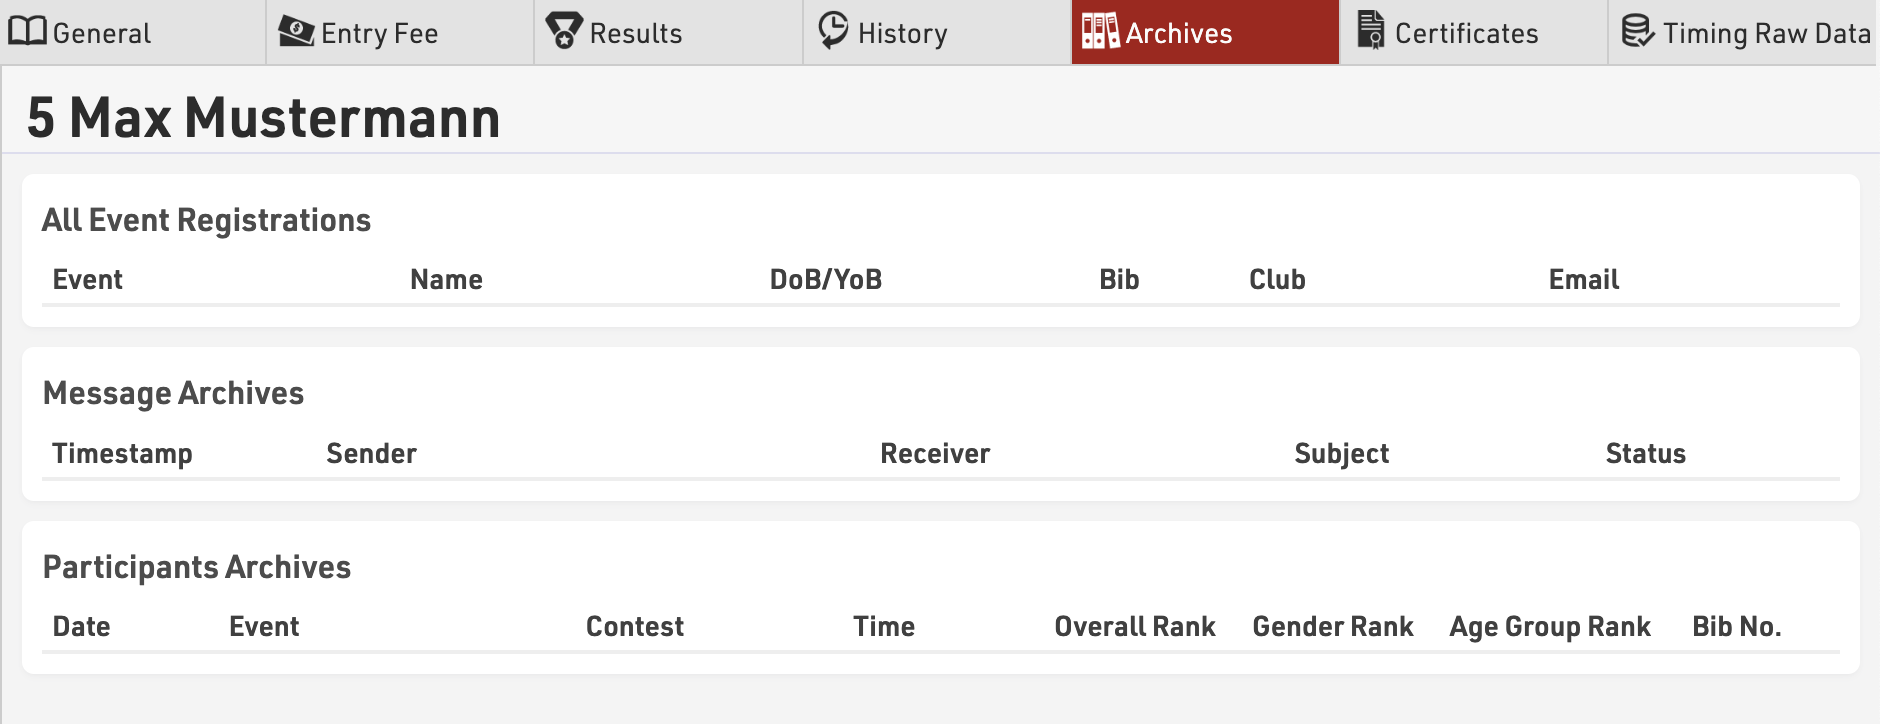
- under All Event Registrations, you will be able to see in which other event of yours the participant is registered. This will allow you to cross-check some information like the Club and the Email address. This section is part of the Customer Database (CRM) which you can find in the RACE RESULT 12 start page.
- Message Archives gives you an overview of all the emails/sms sent to the participant. In this way, you can check the status of emails to be sure that messages have been delivered. This section is part of the Email Archives which you can find in the RACE RESULT 12 start page.
- Participants Archives shows the participant's past results if you have imported past event Archives in your event file.
Certificates
The certificates tab provides a quick way to preview and print / download a participants certificates. A Certificate will be generated for each layout regardless of Certificate Sets.
Simply click the certificate you wish to view and a preview will be generated which you can download / print straight from the preview window.

Timing Raw Data
When working in Raw Data Mode all of the passings for a participant are saved to the event, you can view all of a participants data in the Participants Window - Timing Raw Data tab.
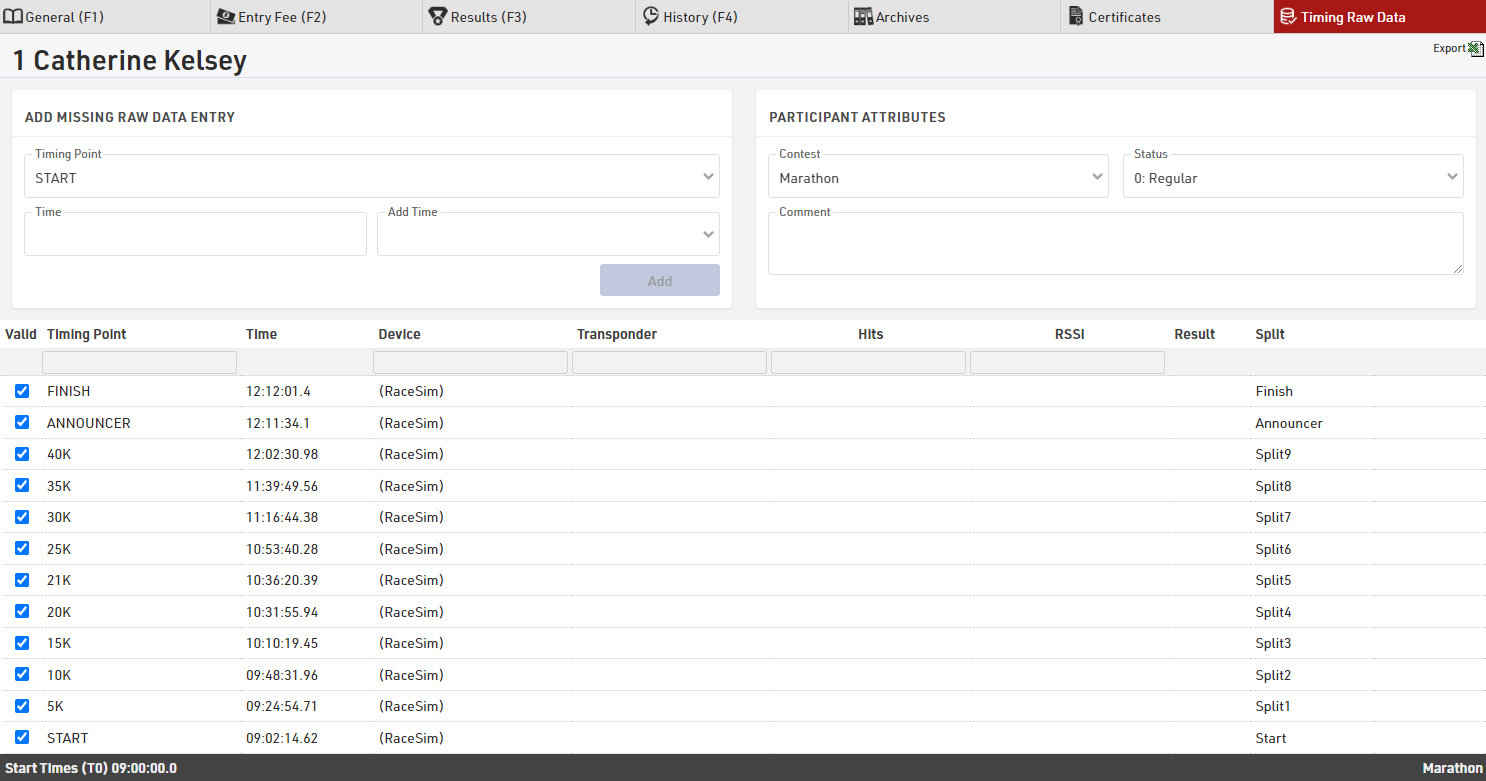
Here you have every recorded passing for the participant, technical information about the passing, and which result the passing has been used for, if any. See Passing Information for more details about understanding the technical information.
If a time should be ignored then untick the box in the first column and the time will be greyed out and ignored for raw data calculations, re-tick the box to use it again. Results will be re-calculated automatically.
If you have missing passings or need to enter additional raw data then you can do this below the table, just select the timing point and enter the time. You can enter the time as time of day, or as a race time / split time and then have the option to add T0 or any other result to this time, useful if you have a net time for a participant or need to add a missing split without calculating the time of day.
If you want to save a copy of all the raw data for review then the export function allows you to export all raw data for just the current participant or all participants.