Výstupné okno slúži na prezentáciu/zobrazovanie údajov rozdelených do 5 kategórií (dostupných z tlačidiel v ľavom hornom rohu).

Zoznamy
Najdôležitejšia metóda na získavanie dát z RACE RESULT 12. Vytvorte si ľubovoľný zoznam dát – či už pre tlačené výsledky, publikovanie online výsledkov, výsledkové obrazovky, nástroje pre vyhlasovateľa, vlastné kontrolné zoznamy na overenie výsledkov alebo akúkoľvek vlastnú správu, ktorú potrebujete.
Certifikáty
Dizajnový nástroj na vytváranie rozložení s textom a obrázkami na stránke. Používajú sa najmä na závodné listy, ale aj na tlač jednotlivých výsledkov alebo na vytváranie účteniek/faktúr.
Sady certifikátov
Určte, ktorí účastníci by mali dostať konkrétny certifikát, tieto sady potom možno vytlačiť alebo zverejniť online alebo k nim pristupovať prostredníctvom nástrojov, ako je kiosk s výsledkami.
Štítky
Vytvorte hárky štítkov s riadkami a stĺpcami na tlač personalizovaných štítkov.
Štatistiky
Vytvorte štandardné alebo vlastné štatistiky z údajov účastníkov.
Vľavo dole sa nachádza filter pre súťaže, v predvolenom nastavení sa výstupy automaticky načítajú pre všetky súťaže, ale môžete rýchlo filtrovať výstup na konkrétne súťaže tak, že ich vyberiete z tohto zoznamu, alebo vyberiete viacero súťaží pomocou začiarkavacích políčok pri umiestnení kurzora myši na položku.
Zoznamy
Zoznamy zobrazujú definovanú množinu polí pre konkrétnu množinu záznamov. Nastavenia zoznamu určujú:
- ktorí účastníci sa zobrazujú
- ktoré dátové polia (stĺpce) sú zobrazené
- ako sú záznamy triedené
- ako sú záznamy formátované
- ako je stránka naformátovaná (formát strany, okraj atď.)
Zoznamy sú navyše zoradené do kategórií. Kliknutím na hlavičku kategórie možno kategóriu zbaliť a rozbaliť. Ak chcete vytvoriť novú kategóriu, kliknite na odkaz Nová kategória zoznamu v hornej časti.Kategórie zoznamu môžete tiež premenovať.
Zoznamy je možné triediť manuálne pomocou drag&drop. Preto presuňte kurzor na voľné miesto vľavo od názvu zoznamu. Zoznam môžete tiež presunúť myšou do inej kategórie. Ak chcete zoznamy zoradiť v kategórii podľa abecedy, kliknite na ikonu .Prázdne kategórie sa pri opätovnom načítaní okna automaticky odstránia.
Kliknutím na názov zoznamu výstupov sa otvorí stránka s prehľadom tohto zoznamu.
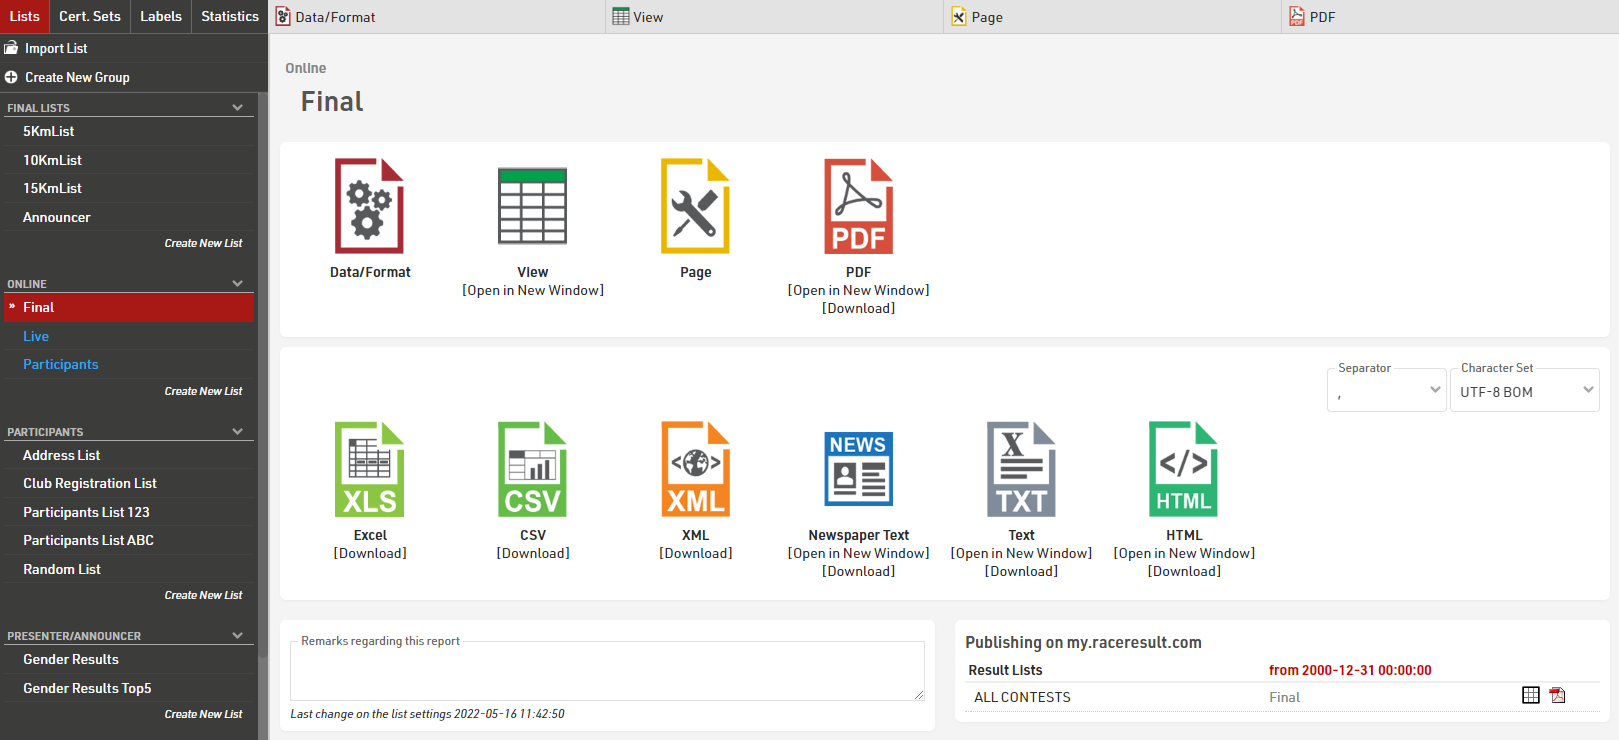
Nastavenia zoznamu sú rozdelené na karty Údaje/Formát a Strana. Údaje/Formát obsahuje všetky nastavenia týkajúce sa údajov zobrazených v zozname a spôsobu ich formátovania, zatiaľ čo nastavenia stránky sa týkajú všeobecného rozloženia stránky a sú relevantné len pre výstupný formulár PDF a HTML.
Ak chcete zobraziť zoznam, kliknite na tlačidlo alebo záložku Zobraziť, toto je možné otvoriť aj v novom okne, zoznamy je možné otvoriť aj priamo na karte Zobraziť dvojitým kliknutím na názov zoznamu v ponuke. Zobrazenie zoznamu vo formáte PDF je tiež možné zobraziť alebo stiahnuť.
Zoznamy je tiež možné exportovať v rôznych formátoch ako EXCEL, CSV, XML, TXT a HTML.
Nastavenia údajov/formátu
Karta Nastavenia údajov/formátu je rozdelená na tri časti: Zoskupovanie/Zoraďovanie, Polia/Stĺpce a Filter. Každá z týchto častí bude vysvetlená ďalej. Podľa nastavení a výberov vykonaných v týchto sekciách sa údaje účastníkov zobrazia vo výstupnom zozname.
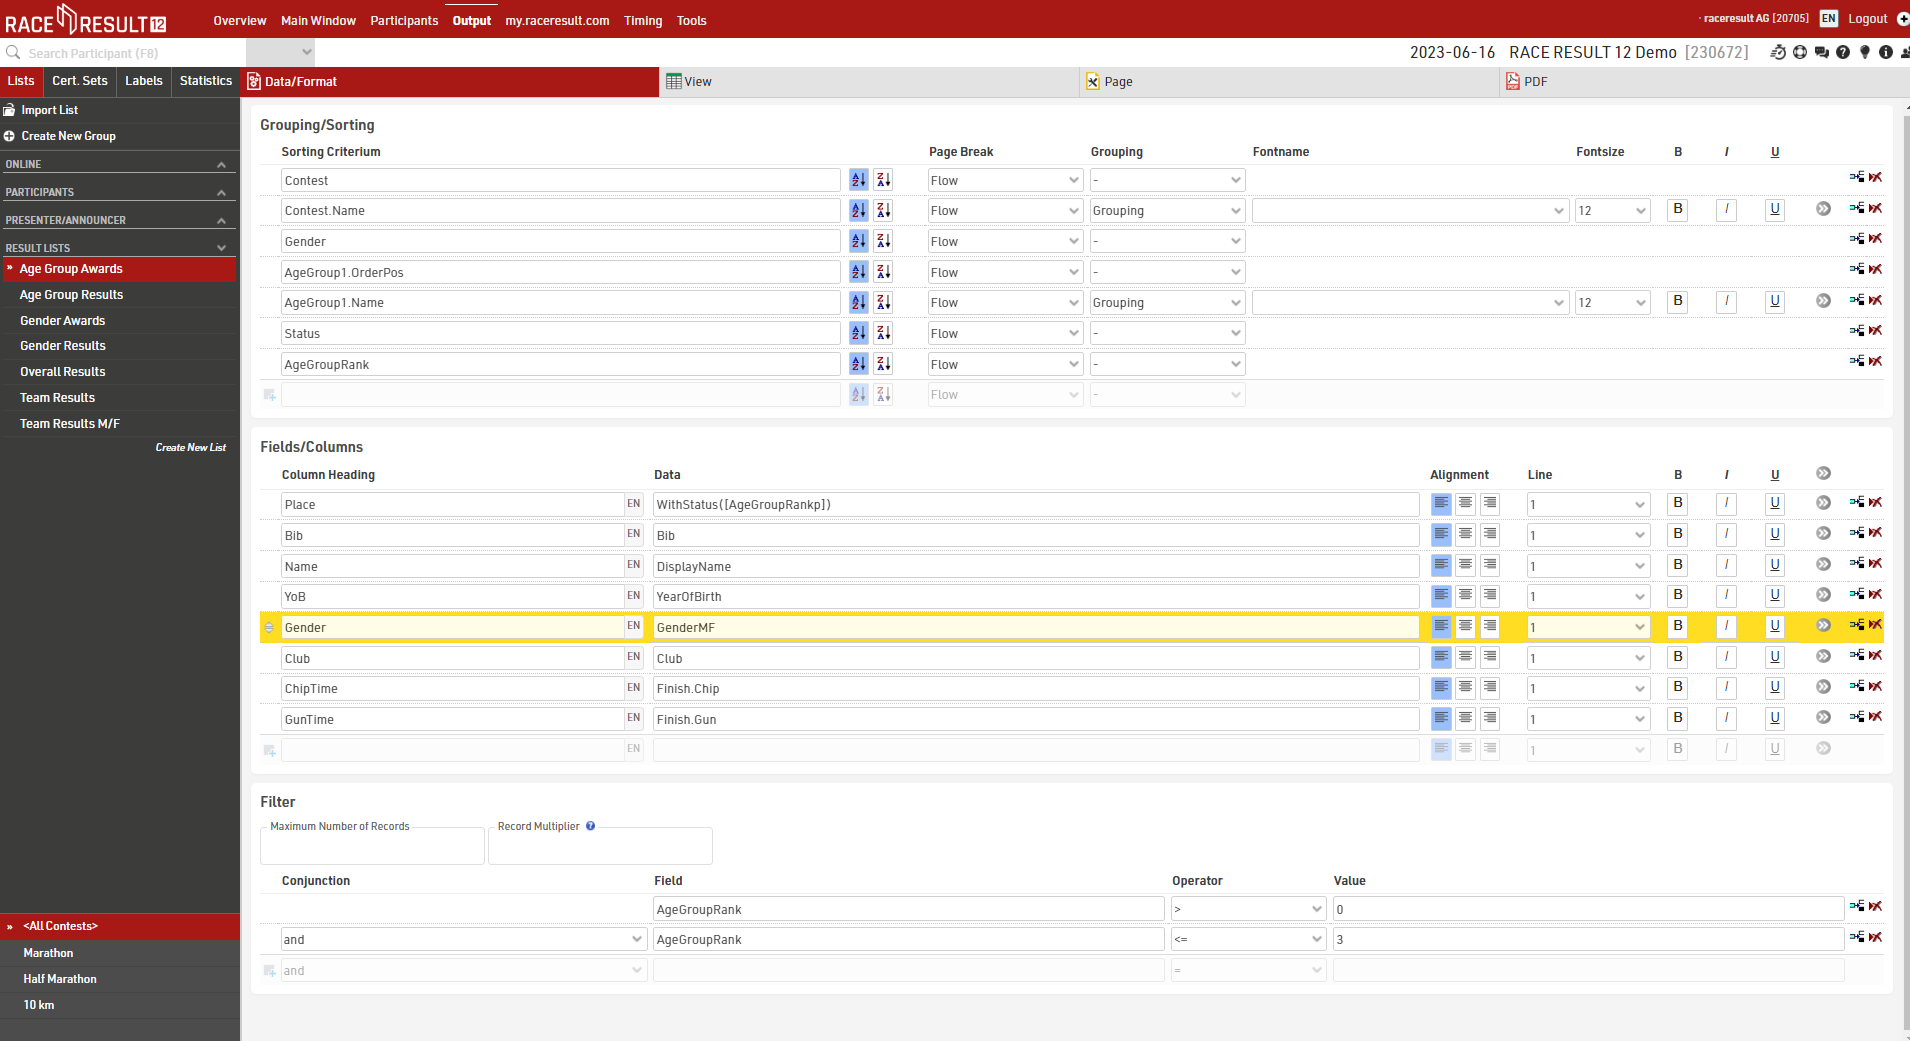
Zoskupovanie/triedenie
Táto časť definuje, ako budú zoradené záznamy v zozname. Jednoducho vyberte jedno alebo viac polí z Field Wizard, ktorý sa objaví pod zadávacím poľom. Zoznam bude zoradený podľa prvého poľa a ak toto pole nie je rozhodujúce, podľa druhého atď.
Po druhé, vyberte, či majú byť záznamy zoradené vzostupne alebo zostupne.
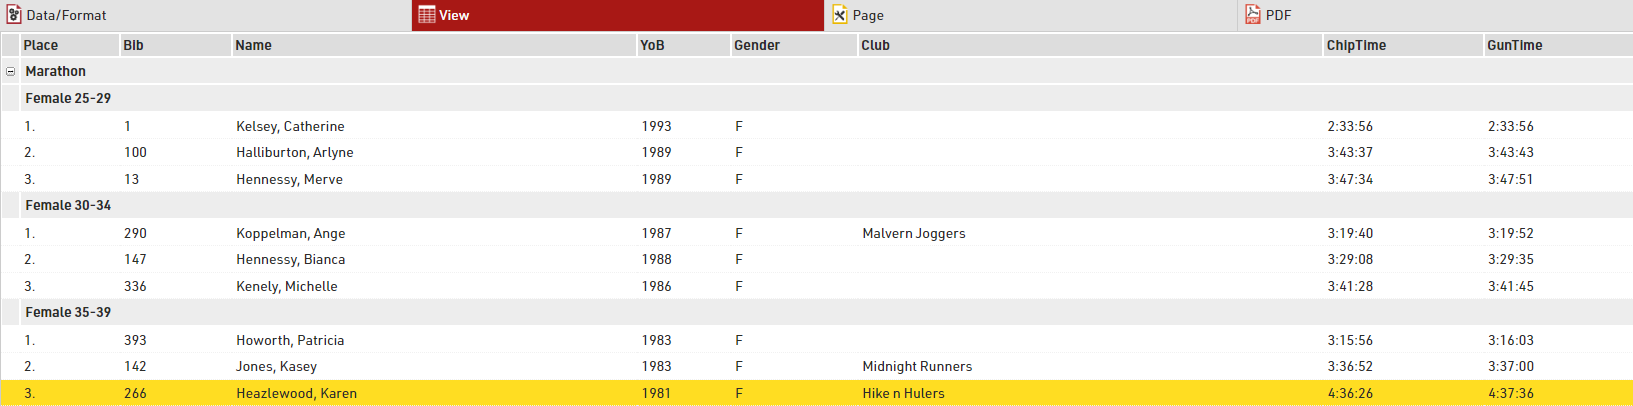
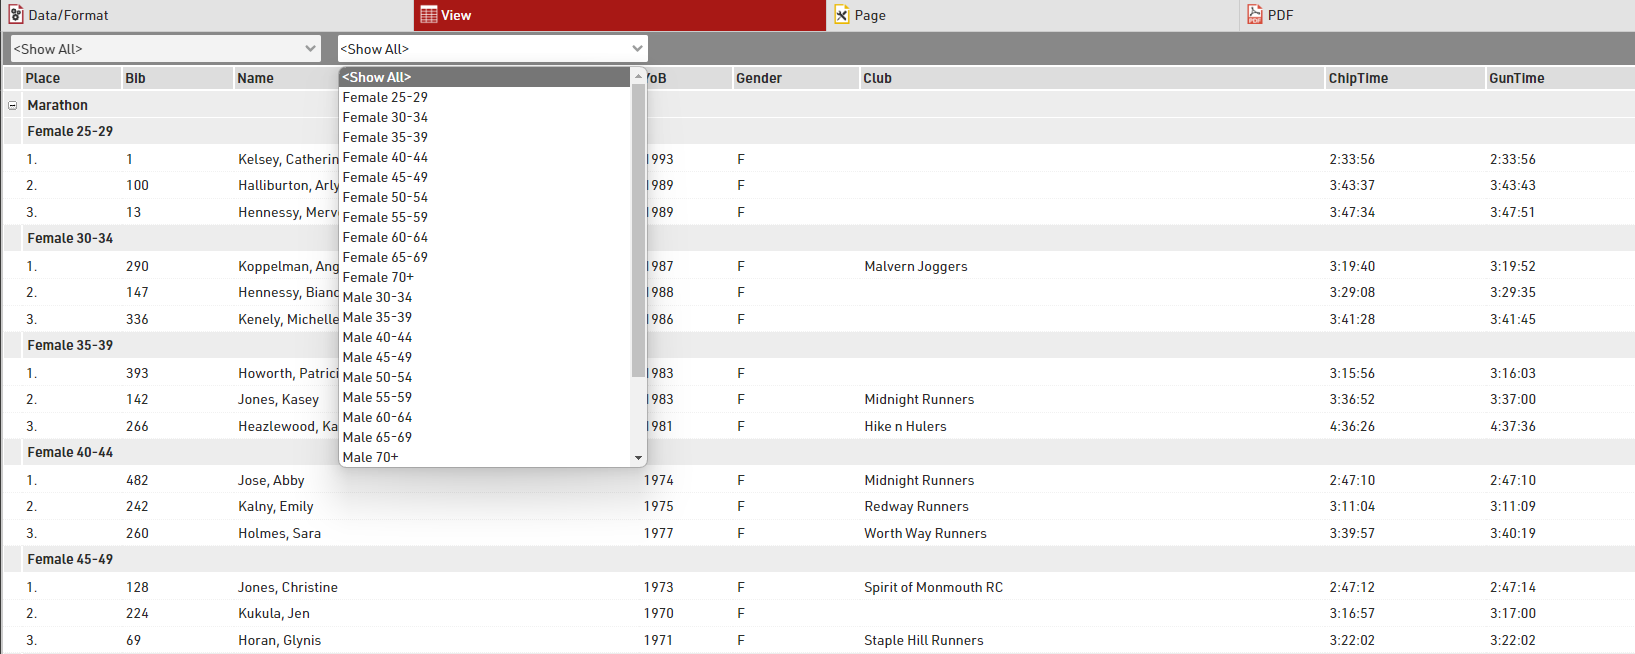
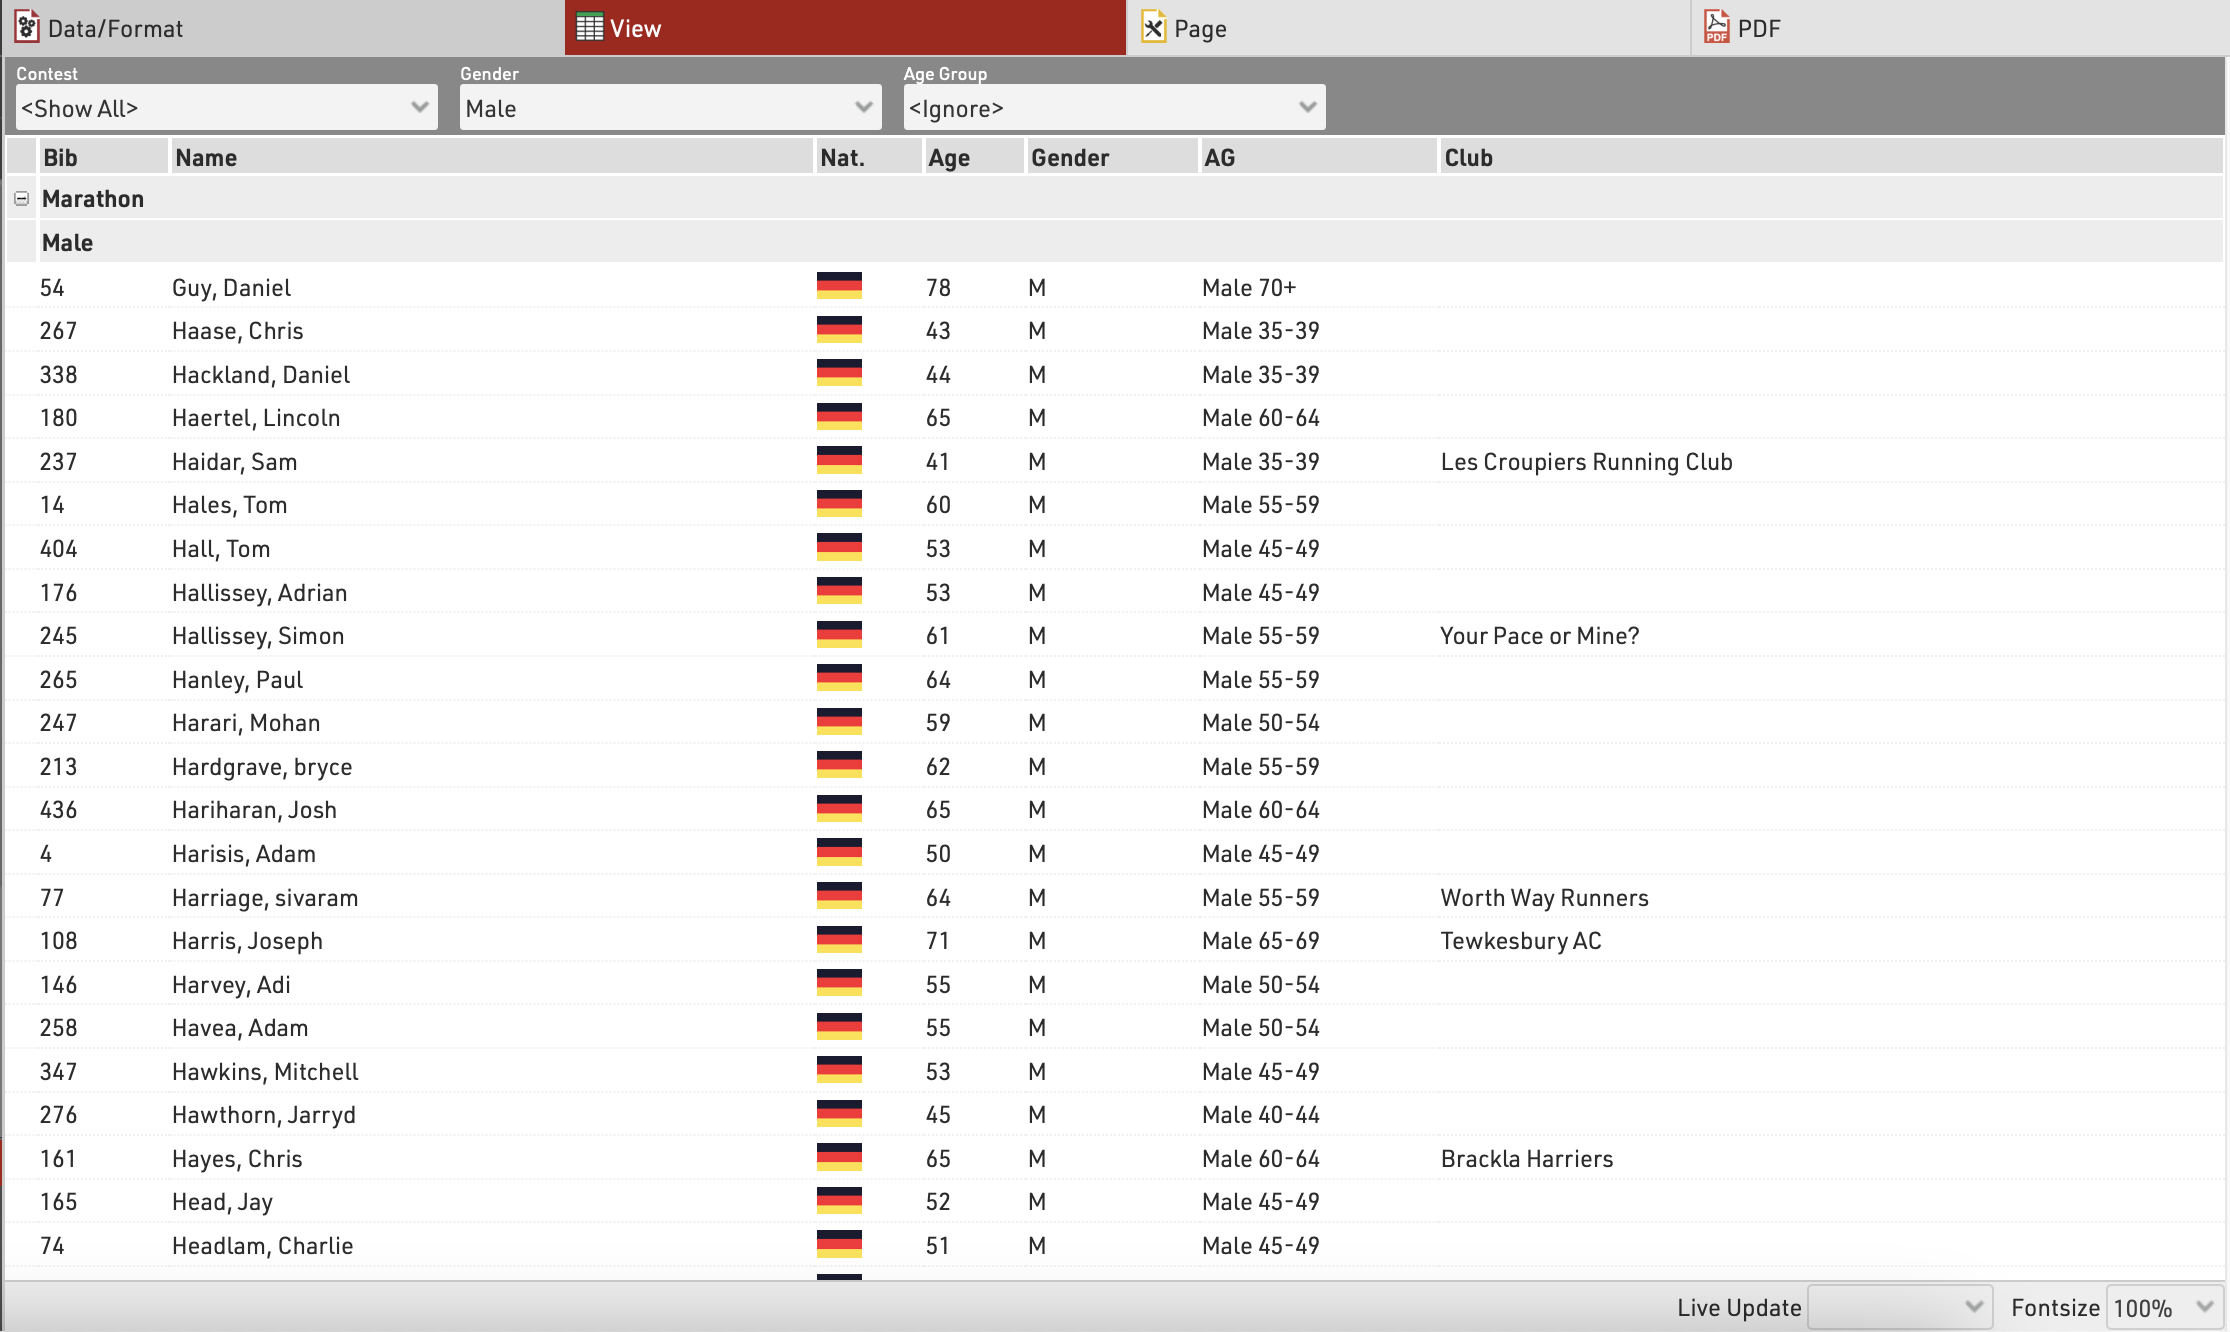
Polia možno použiť aj ako zoskupenie alebo filter, pri použití ako zoskupenie sa potom pre každú hodnotu skupiny na všetkých typoch výstupov vloží riadok hlavičky skupiny. Alternatívne je možné zoznam filtrovať podľa skupiny, pri tomto nastavení sa v náhľade a tiež na stránke my.raceresult.com pre každý filter zobrazí ďalšia rozbaľovacia ponuka, ktorá potom môže zobraziť všetky skupiny, filtrovať na konkrétnu skupinu alebo ignorovať túto úroveň zoskupenie všetkých (ak je vybratý filter s ignorovaním). Filter je obzvlášť užitočný pre online výsledky, aby sa v nich ľahšie navigovalo / filtrovali údaje, ktoré si niekto skutočne chce pozrieť.
Tento zoznam je zoskupený podľa súťaží a vekových skupín:
a pod tým istým zoznamom pomocou filtra namiesto jednoduchého zoskupovania
Ďalšie podrobnosti a možnosti nájdete v časti Podrobnosti zoskupovania/triedenia
Polia/Stĺpce
V sekcii Polia/Stĺpce vyberte polia, ktoré budú tvoriť stĺpce vášho prehľadu. Do poľa Záhlavie stĺpca zadajte popis poľa a do poľa Údaje vyberte pole z Sprievodcu poľom alebo zadajte výraz. Napríklad pomocou výrazu môžete skombinovať polia Priezvisko, Meno a Rok narodenia do: "Laň, Ján (70)"
Zodpovedajúci výraz by bol:
[DisplayName] & "(" & [YearOfBirth] & ")"
Vyberte číslo riadku väčšie ako 1 na vytvorenie Multi-Line Lists.
Kliknutím na tlačidlo s ďalšími podrobnosťami pre toto pole prejdete do Nastavenia stĺpca rozšíreného zoznamu.
Filter
Nastavením filtra môžete z prehľadu vylúčiť určité záznamy. Ak nedefinujete filter, v prehľade sa zobrazia všetky záznamy.
Filtre sú dôležité najmä pre zoznamy výsledkov: chceli by ste zobraziť iba tých účastníkov, ktorí už skončili. Zvyčajne bude filter taký, že rank musí byť väčšie ako 0.
Namiesto nastavenia filtra môžete tiež obmedziť počet záznamov zobrazených v zozname nastavením maximálneho počtu záznamov.
Okrem toho Násobiteľ záznamov umožňuje zobraziť záznamy viac ako raz s rôznymi informáciami (napr. časy kôl) v zozname.
View
When viewing lists there are some additional functions and shortcuts to make working with the list and participant data easier.
Any Filters you have applied to the list will be shown at the top of the list, allowing you to quickly filter to specific data sets. If using Groupings then the groups can be expanded or collapsed using the +/- icon at the start of the row.
Hovering over a row will highlight that entire row yellow.
Clicking on a row will open the Participants Tab directly to that participant record, if the right-side dock is open to the Participants Tab then it instead the participant record will be opened here.
Live Update allows you to set the list to automatically refresh at a pre-defined interval (from 1s to 60s), useful for monitoring specific lists during a race in an additional window.
Font size can also be adapted between 40% and 200%.
Page Settings
The settings in the Page tab are mostly relevant for the PDF output format as well as partially for the Presenter (marked with a *) and define how the records will be formatted and which additional information will be shown in the page header and footer.
Page Settings
Select here the page format, choose between portrait and landscape orientation and define the page margin in millimeters.
Multi Column
In some cases it can be helpful to split the page into several columns:
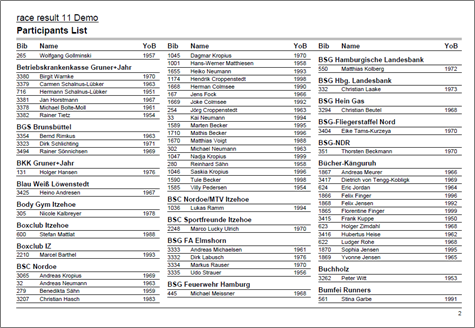
Simply define the number of columns and the column spacing in the Page settings of your list.
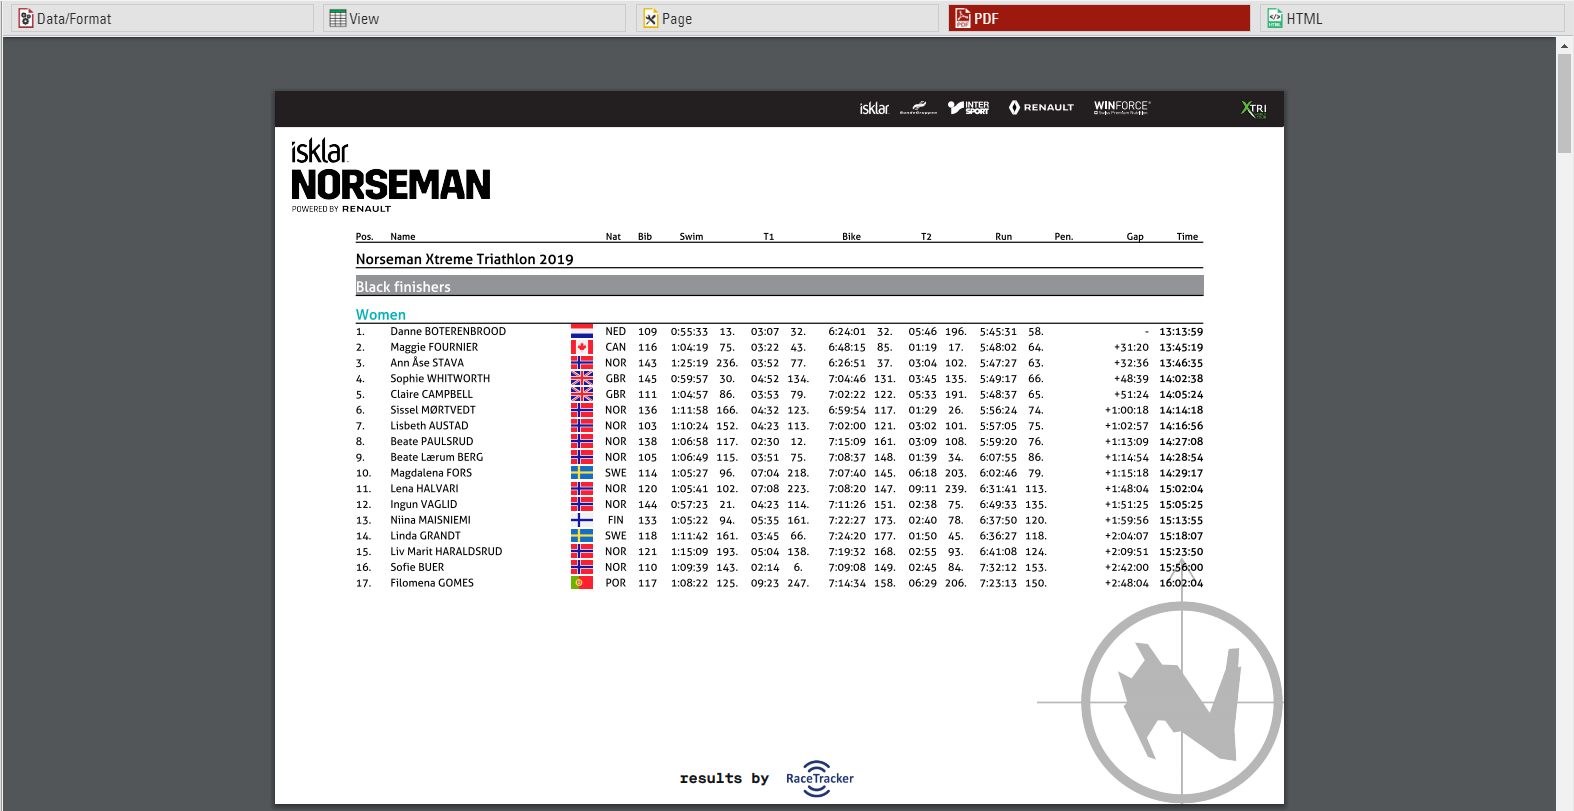
Background
The settings under Page Header allow you to put a picture in the top right corner of the report. However, if you require more flexibility regarding the design of the list, you can select a certificate at Design that will be shown in the background. This option gives you unlimited flexibility in designing your reports.
Cover sheet
Similar to the background, you can insert a certificate as additional Cover Sheet at the beginning of your report and an additional Back Sheet at the end of the report.
Page Header
Via these settings you can add and format the following elements of the page header: two header text lines*, the column headers*, a picture (which will be shown in the top right corner) and a gray line below the two header lines.
Records *
Define here the font type and size of the data records. Additionally, define if there shall be a thin line between the records and if every other line shall have a gray background. Via the Line Spacing setting you can define the height of the records.
Hint: Probably you would like to have the same font type throughout the entire report. Therefore, simply select the font type here and leave all other font type boxes empty. The font type for the records will then also be used for the header and footer texts.
Page Footer
You can add several texts and an image to the page footer. For example enter [Page] to show the page number in the footer of your report.
List Header and Footer
Enter an additional text that will be shown at the beginning/at the end of the list.
Output Selector
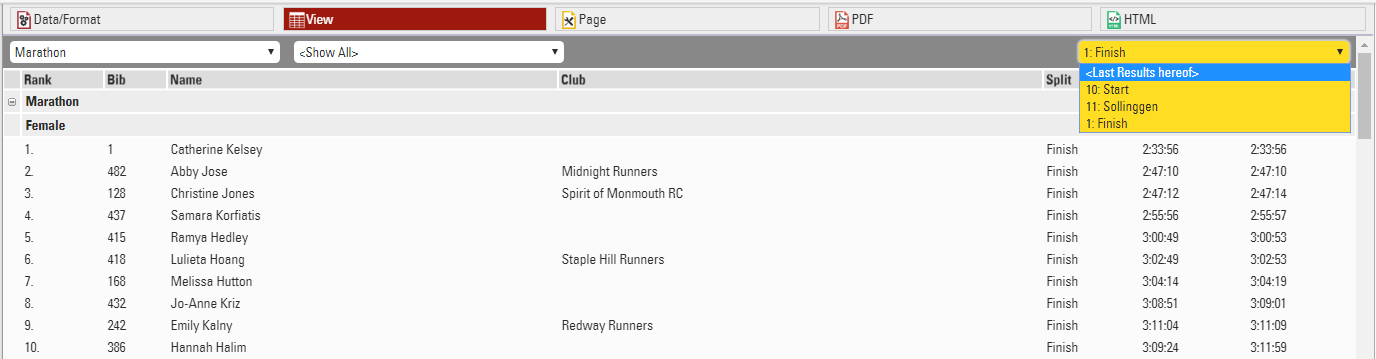
The output selector is designed to allow for easier creation of results lists which may otherwise require multiple output lists and ranks to be setup. It also includes an option to always show the last result which makes live results lists even easier to setup.
When the output selector is enabled an additional filter is shown which allows the user to select which result they want to look at, there are then a few different fields which can be used to show information according to which result is selected.
Inserting Images
Images can be inserted in to Output lists, these can be useful for functions such as linking to participant photos, videos or team logos.
Images can be inserted either from the event file pictures, a user-defined function or from an external URL link.
To insert an image use the code:
"[img:ImageName.png|height:30px]"
Ensuring that "ImageName.png" is the correct name and file ending of your image.
"ImageName.png" can be replaced with either your user-defined function or the URL of the image. When replacing the image name with a UDF or other data field you need to concatenate the data field name with the rest of the string.
"[img:"&[ImageUDF]&"|height:30px]"
If no height is defined then the image will be shown in full size.
Certificates / Certificate Sets
Contrary to a List, a Certificate creates a page for each participant. Texts and pictures can be placed freely on the page. A certificate primarily serves to:
- Print name, time, etc. on a pre-printed certificate during the event.
- Displaying/Printing of certificates on my.raceresult.com (complete with background image).
In addition, certificates can be used for:
- other print-outs, such as confirmation of registration, invoices, receipts, lap reports at a 24h-race, etc.
- Background image for a List
- Cover sheet and closing page for a List
- Content of Labels
Certificate layouts should first be created in the Certificates tab which opens the design tool to create different layouts for different purposes.
Once you have a certificate setup, Certificate Sets define for which participants a certain certificate will be created. You can edit the settings of a Certificate Set by clicking on Settings after selecting the certificate set in the Output Window.
Certificate Sets serve to print sets of certificates. To print out single certificates, go to the Certificates tab in the Participants Window.
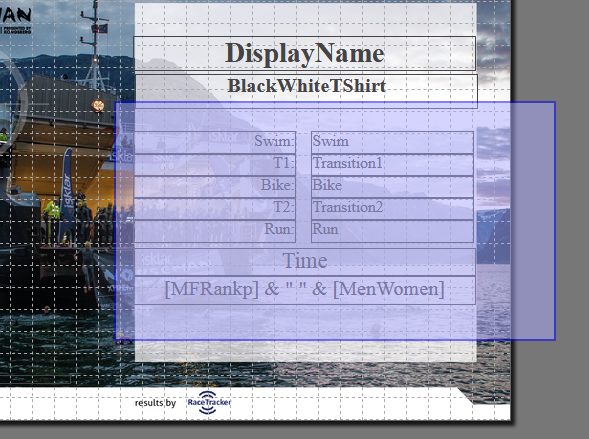
Dizajnér
Dizajnér slúži na navrhovanie certifikátov alebo na navrhovanie menoviek a ako podklad pre zoznamy.
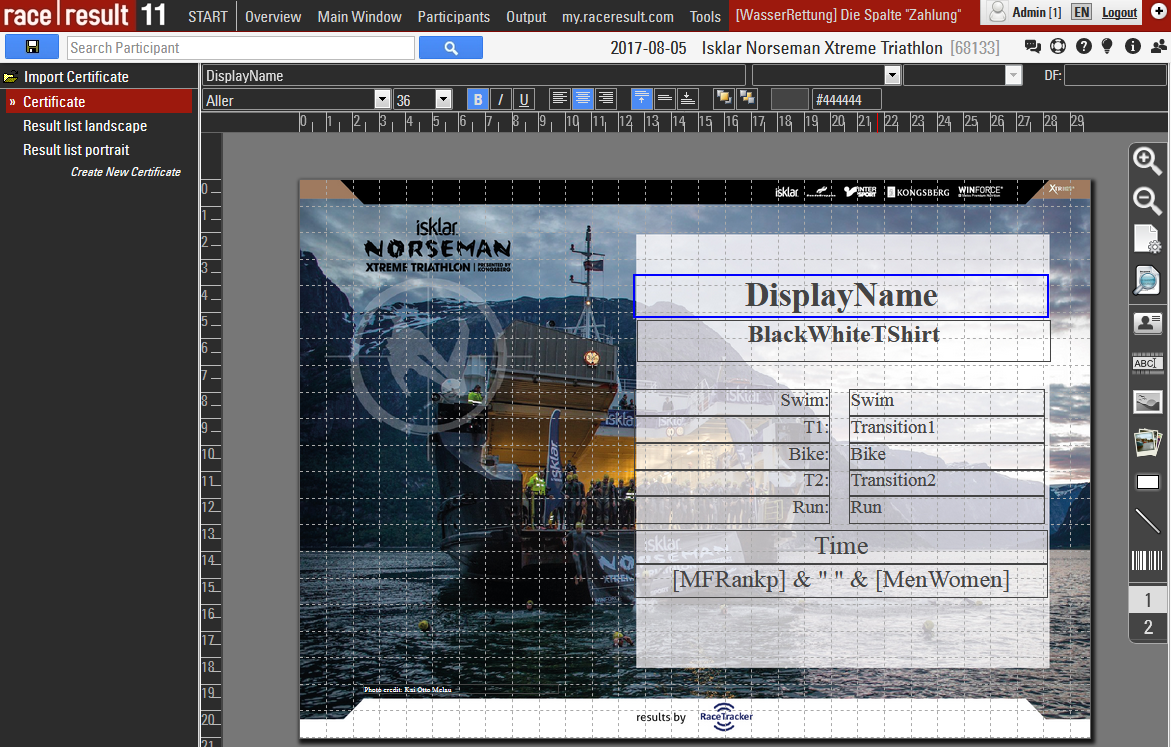
Zoznam naľavo zobrazuje všetky certifikáty v súbore podujatí. Po kliknutí na jednu z nich sa na pravej strane zobrazí úkážka.
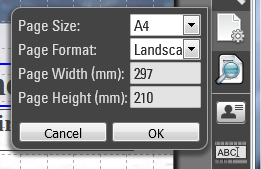
Nastavenia strany
Najprv definujte veľkosť stránky a vyberte medzi orientáciou na šírku a na výšku:
Náhľad
Týmto tlačidlom môžete kedykoľvek zobraziť skutočný náhľad certifikátu pre ľubovoľné číslo bib:
Pridávanie prvkov
Menu vpravo ponúka rôzne typy prvkov, ktoré môžu byť umiestnené v certifikáte:
- Polezobrazuje konkrétne údaje účastníka, napr. priezvisko alebo výraz. Zadajte ho do textového poľa v ľavom hornom rohu.
- Text zobrazuje statický text, napr. slovo certifikát. Zadajte text aj do textového poľa v ľa om hornom rohu.
- Pomocou ikony Obrázok môžete pridať obrázok.
- Obrázok závislý od údajov môže zobrazovať rôzne obrázky pre rôznych účastníkov. Názov obrázku, ktorý sa má zobraziť, je definovaný výrazom.
Ak by ste napríklad v certifikáte chceli ukázať vlajku štátnej prílušnosti účastníka, budete musieť do súboru podujatia importovať vlajky pre každá národ, je ľahké ich nájsť online s jednotnými názvami, napríklad pomocou kódu NationAlpha2. - Ak sú vlajky uložené ako vlajka_XX.jpg kde XX je názov krajiny vo formáte ISO Alpha 2.
- Potom pridajte obrázok závislý na tomto výraze:
"flag_" & [NationAlpha2] & ".jpg"
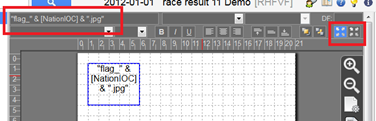
Ak obrázky nemajú rovnaký rozmer , možno budete chcieť vypnúť režim roztiahnutia a namiesto toho zmeniť veľkosť obrázka tak, aby sa zachoval pomer strán (pozri pravý horný roh snímky obrazovky). - Rect je jednoducho štvorec vyplnený úplne jednou fatbou.
- Tiež môžete vložiť riadok.
- Čiarový kód môže na certifikáte zobrazovať čiarový kód aleb QRCode.
Po pridaní prvku do certifikátu ho môžete umiestniť a zmeniť jeho veľkosť pomocou myši. Prípadne môžete použiť kurzorové klávesy (pozri kódy klávesnice v ľavom dolnom rohu) alebo použiť vstupné polia v dolnej časti obrazovky na umiestnenie a zmenu mierk.
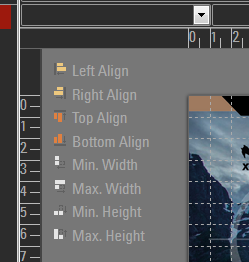
Zarovnanie prvkov
Vyberte niekoľko prvkov súčasne kliknutím a podržaním tlačidla myši a pretiahnutím výberového obdĺžnika nad jednotlivé prvky.
Prípadne môžete držať klávesu Ctrl key na klávesnici a klikať na jeden prvok za druhým.
Potom sa tieto funkcie objavia v ľavom hornom rohu na zarovnanie prvkov:
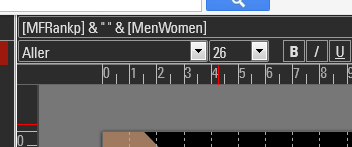
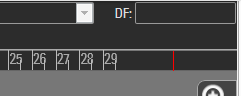
Dynamické formátovanie
Ak chcete pre certifikáty použiť dynamické formátovanie zadajte výraz do poľa DF:
Strany
Certifikát môže voliteľne obsahovať viak ako jednu stránku. Stačí kliknúť na "2" na paneli nástrojov na pravej strane por prístup na stranu 2. Akonáhle tam umiestnite prvok, môžete pridať stránku 3 atď.
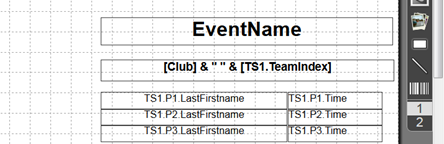
Tímové certifikáty
Certifikáty pre tímy fungujú rovnako ako bežné certifikáty. Miesto individuálneho poradia a času by ste mali ukazovať poradie a čas tímu. Ak chcete zobraziť aj informácie o ostatných členoch tímu, jednoducho zadajte pole/výraz v ľavom hornom rohu a potom vyberte čas tímu a účastníka.

Napríklad na zobrazenie priezviska druhého účastníka tímu (podľa skóre tímu 1), systém použije pole TS1.P2.Priezvisko. V ukážke vidíte, že výber tímu / účastníka Vám pomôže iba nastaviť certifikát, ale intere sa použije názov poľa.
Certificate Set
Certificate Sets will be created in the Output Window. A certificate set contains the Certificates for certain participants in a given order. The settings for a certificate set decide:
- for which participant a certificate will be created
- which certificate (layout) is used
- how the certificates are ordered
For example: the certificates of the first three of each age group ordered by the age group name and the age group rank.
Select a certificate set in the Output Window and then click on Settings to access the following settings:
Certificate Layout
First, select the Certificate layout which should be used.
Then choose if you would like to create individual or team certificates. If you choose Team Certificate (1 per Participant), certificates will be created only for members of a team. If you select Team Certificate (1 per Team) a certificate will be printed only for the first member of each team.
For which Participant do you want to create certificates?
You can further limit for whom certificates will be printed. Oftentimes certificate sets are filtered by a rank, for example if you want to print certificates for only the best three. You can also enter a general filter.
Order of the Certificates
Determine in what order the certificates will be created.
Labels
Labels are normally printed on pre-cut label sheets and allow you to place either text or a certificate design on each label.
The Label Settings determine the basic layout and template for the labels.
Participants
A Filter that defines for which participants a label will be created.
Sorting Fields that define how the labels will be sorted.
Content
Enter an Expression that defines the content for each label.
Other
The Directional layout (row / column direction) of the labels.
Optionally a design to be printed instead of the Expression, see Labels with Design, if a design is selected then it can be edited directly through the Layout tab.
Optionally replace the content of the label with an automatically generated Barcode for each label, the barcode will include the bib number.
Font
Define the font, font size, formatting and alignment for text.
Page
Page settings for each sheet, these are normally provided by the manufacturer of the label sheets.
Label
The individual label sizing / spacing, these are normally provided by the manufacturer of the label sheets.
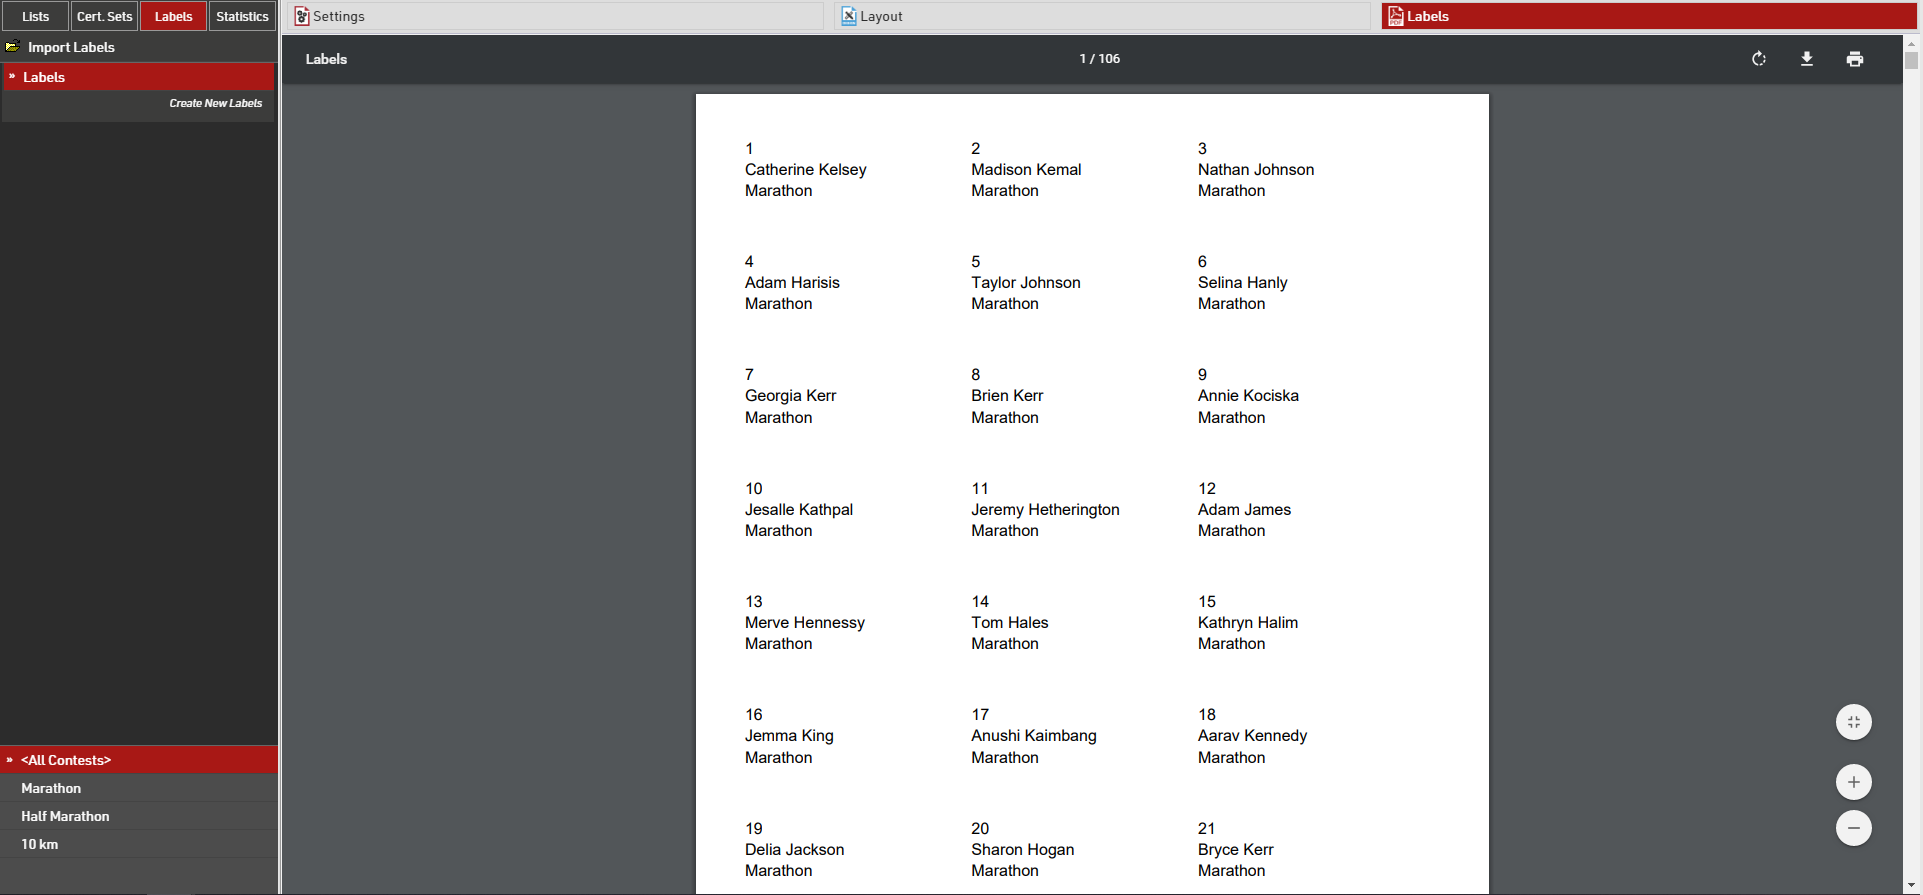
Once the settings are defined you can preview, download and print the labels through the Labels tab, an example might look like this.
Labels with Design
If you need more flexibility regarding the design of the labels, you can remove the expression in the settings and instead select a certificate that will be printed on each label. For example:
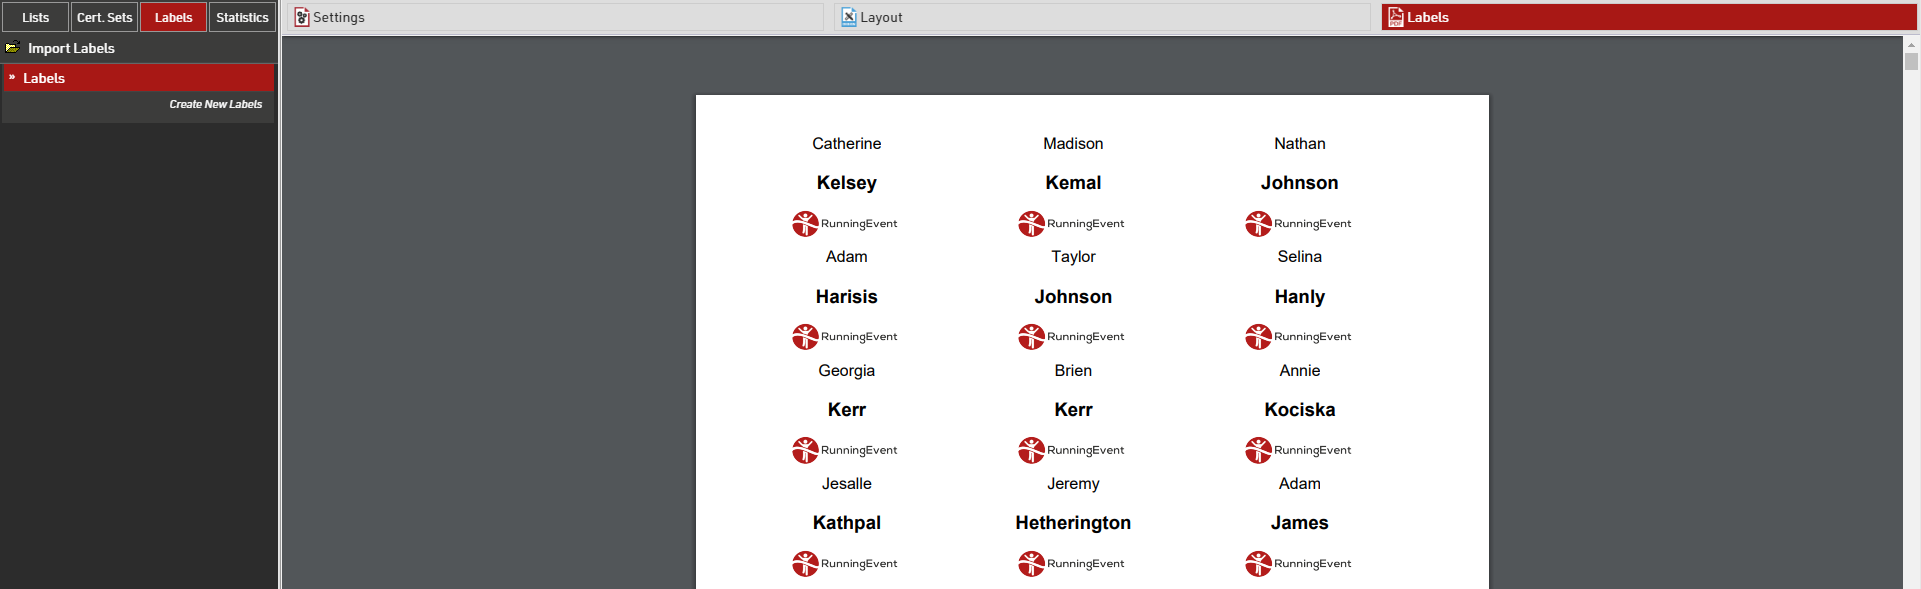
If a certificate is selected, you can click the tab Layout to open the Designer and edit the certificate:

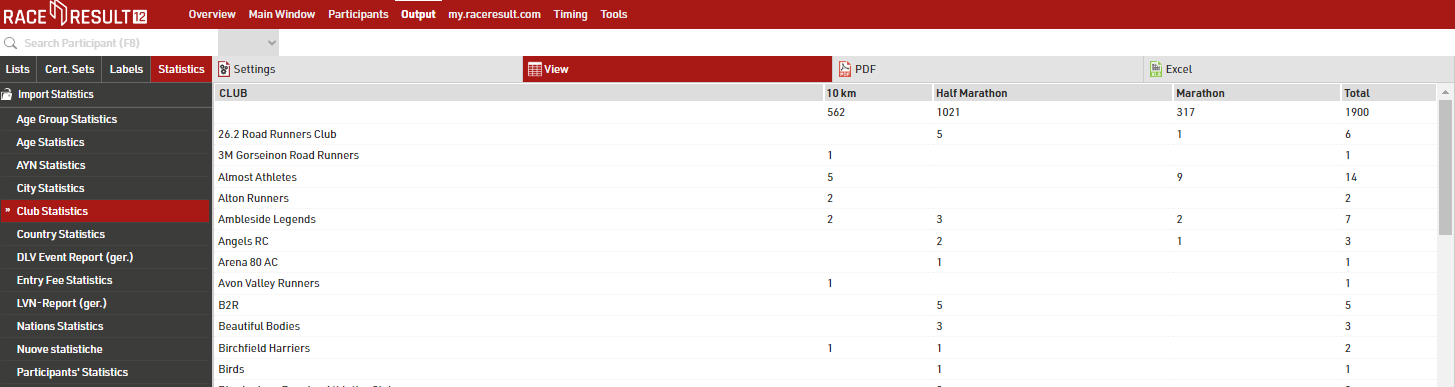
Statistics
Every new event file has numerous default Statistics, for example Club Statistics that shows the number of participants per contest and Club:
Create new type of statistics
You can easily create a new type of statistics. The most relevant settings are Rows, Columns, Field, and Mode.
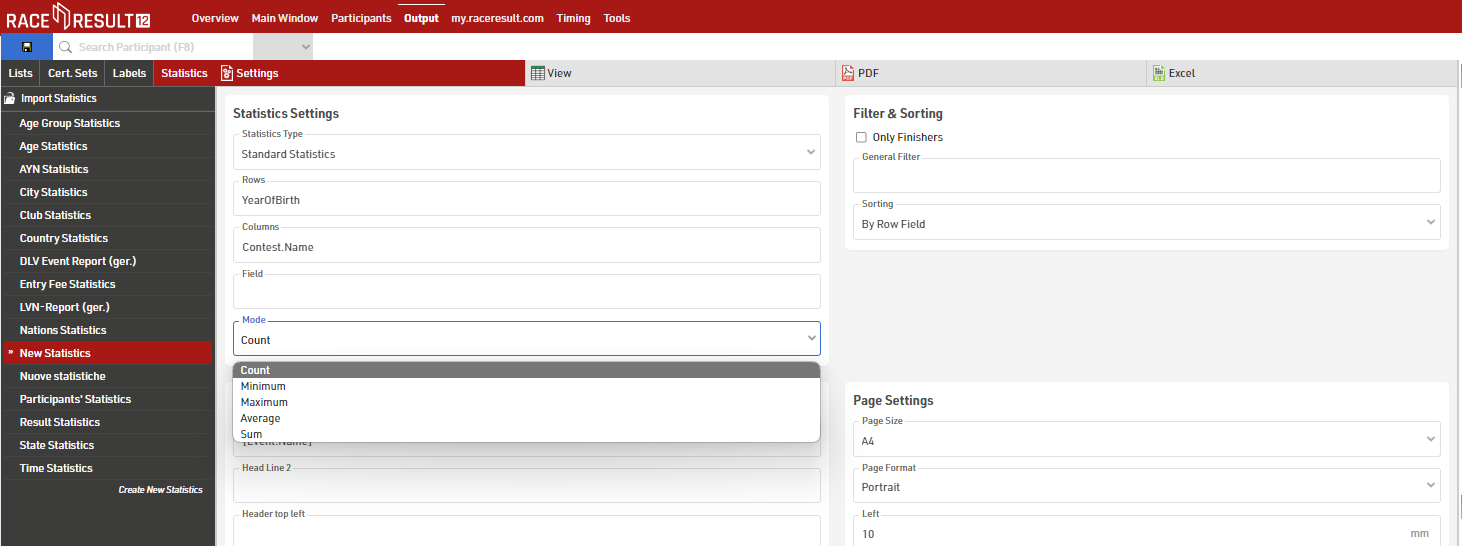
In most cases you will use the mode Count: the number of participants matching the row and the column field will be counted.
Alternatively, you can select a field over which the minimum/maximum/average/sum will be calculated.
If you want to restrict the participants considered for the statistics, enable Only Finishers or enter a General Filter.
Special Types of Statistics
Besides these statistics there are some special types of statistics:
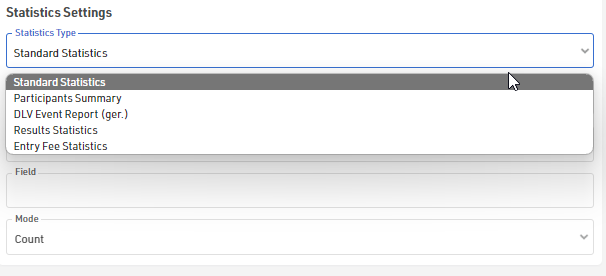
- Participants Summary creates a PDF with a general statistics of the event.
- DLV and LVN Event Report are reports for German federations.
- Results Statistics shows how many participants have a time in each result.
- Entry Fee Statistics lists all entry fees and calculate the sum over all participants for each entry fee.
- AYN Statistics lists all AYNs and shows how many participants are ticked for the respective AYN.
Dynamic Formatting
Dynamic Formatting allows to format the individual records of Lists and Certificates differently, for example men could be printed in blue and women in pink.
An Expression is used which generates a text with formatting instructions. This expression is entered for lists in the Extended Column Settings and for Certificates.
The formatting text can contain several instructions which are separated by semicolons:
Element1;Element2;...
These elements can be:
|
B |
Bold |
| I | Italic |
| U | Underlined |
| S | Strike-Through |
| AL | Align Left |
| AC | Align Center |
| AR | Align Right |
| C(X) | Font Color X |
| BG(X) | Background Color X |
| T(X) | Transparency level (0-100%) |
|
BTC(X) / BRC(X) BBC(X) / BLC(X) |
Border Top / Right / Bottom / Left Color X |
| BTW(X) / BRW(X) BBW(X) / BLW(X) |
Border Top / Right / Bottom / Left Width X |
| FS(X)* | Font Size X in pt |
| OC(X)** | Outline Text Color X |
| OW(X)** | Outline Width X Value 0-5 in 0.5 increments |
* only applicable to outputs in PDF and certificates in Designer. For PDF outputs X must be smaller than the default font size.
**only applicable to certificates in the Designer
Possible color values are:
See more information on colours HERE
Examples
A field will be printed italic for women:
if([Sex]="f"; "I"; "")
A field is formatted with a red background and white text for participants with Age less than 18.
if([Age]<18; "BG(#FF0000);C(#FFFFFF)"; "")
A field is marked red for participants from USA:
if([Nation.IOC]="USA"; "C(255,0,0)"; "")
Colors
The Colors of the text elements on Lists and Certificates can be adjusted. By default all texts are shown in RGB-black.
RACE RESULT 12 supports RGB colors as well as CMYK colors.
The colors of the columns in a list can be edited in the Extended Column Settings. You can use the following formats:
- a hex value, like in HTML (RGB), e.g. #FF3300
- RGB as a decimal value, e.g. 255,51,10
- CMYK as a decimal value, e.g. 30,30,30,100
In Certificates, both RGB and CYMK colors can be set via the tool bar at the top of the screen.
With the help of Dynamic Formatting, fields can be formatted differently for each data record.
The following website is useful for picking colours and can convert between HTML, RGB and CMYK: https://html-color-codes.info/
CMYK Colors
RGB colors
RGB is a color space for screen colors. The colors on your monitor are put together by the components R=red, G=green and B=blue. An RGB color value consists of three values between 0 and 255 which are often specified as hexadecimals between 00 and FF. The higher the value, the stronger the color - white has the value #FFFFFF or (255,255,255) and black has the value #000000 (0,0,0).